Streamline your business with our all-in-one management software. Access 100s of templates tailored for various businesses to get started quickly. Manage leads, proposals, contracts, e-signatures, invoices, projects, and more effortlessly. Try Xora for free!"

Xora

Category: Photographers Page 2 of 3

Here, we delve into the dynamic world of photography, offering insights, tips, and inspiration for photographers of all levels. Whether you’re a seasoned professional or an enthusiastic amateur, our articles are designed to enhance your skills, expand your knowledge, and fuel your creative journey. Discover expert advice on various photography genres, from portrait and landscape to wedding and product photography. Learn about the latest gear, editing techniques, and industry trends to stay ahead of the curve.

Explore our extensive library of resources, including:

In-Depth Tutorials: Step-by-step guides on mastering photography techniques and tools.
Creative Tips: Innovative ideas to inspire your next photo shoot and help you capture stunning images.
Gear Reviews: Honest reviews and recommendations on the best cameras, lenses, and accessories.
Editing Techniques: Tips and tricks to enhance your photos using popular editing software.
Business Advice: Strategies for marketing your photography services, managing clients, and growing your business.
Join our community of passionate photographers, share your experiences, and take your photography to new heights with Xora. Happy shooting!

4 Tips for Incredible Event Photography: Unleash Your Creative Genius and Capture Unforgettable Moments

event photography
4 Tips for Incredible Event Photography: Unleash Your Creative Genius and Capture Unforgettable Moments 1

Introduction to Event Photography

Event photography can be a challenging yet rewarding endeavour. Whether it’s a wedding, corporate event, or an intimate family gathering, capturing those fleeting moments requires skill, quick thinking, and the right equipment. In this comprehensive guide, we’ll share four crucial tips for enhancing your event photography, helping you to unleash your creative genius and capture unforgettable moments. Prepare to delve into the importance of preparation, the art of candid shots, the power of the telephoto lens, and the magic of a flash diffuser.

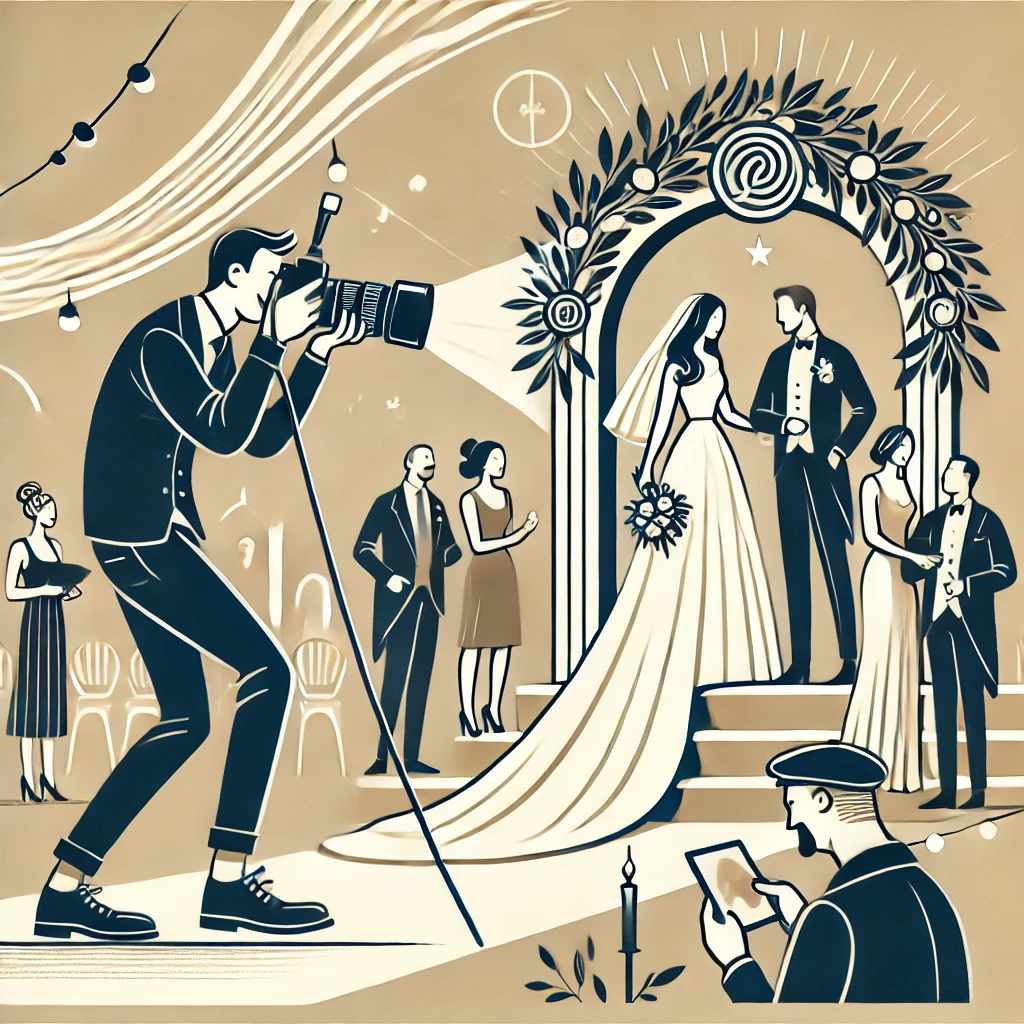
1. Preparation: The Key to Successful Event Photography

Preparation is the cornerstone of excellent event photography. Without proper planning, you could miss vital moments or find yourself struggling with technical issues. Here are some critical steps to ensure you’re well-prepared:
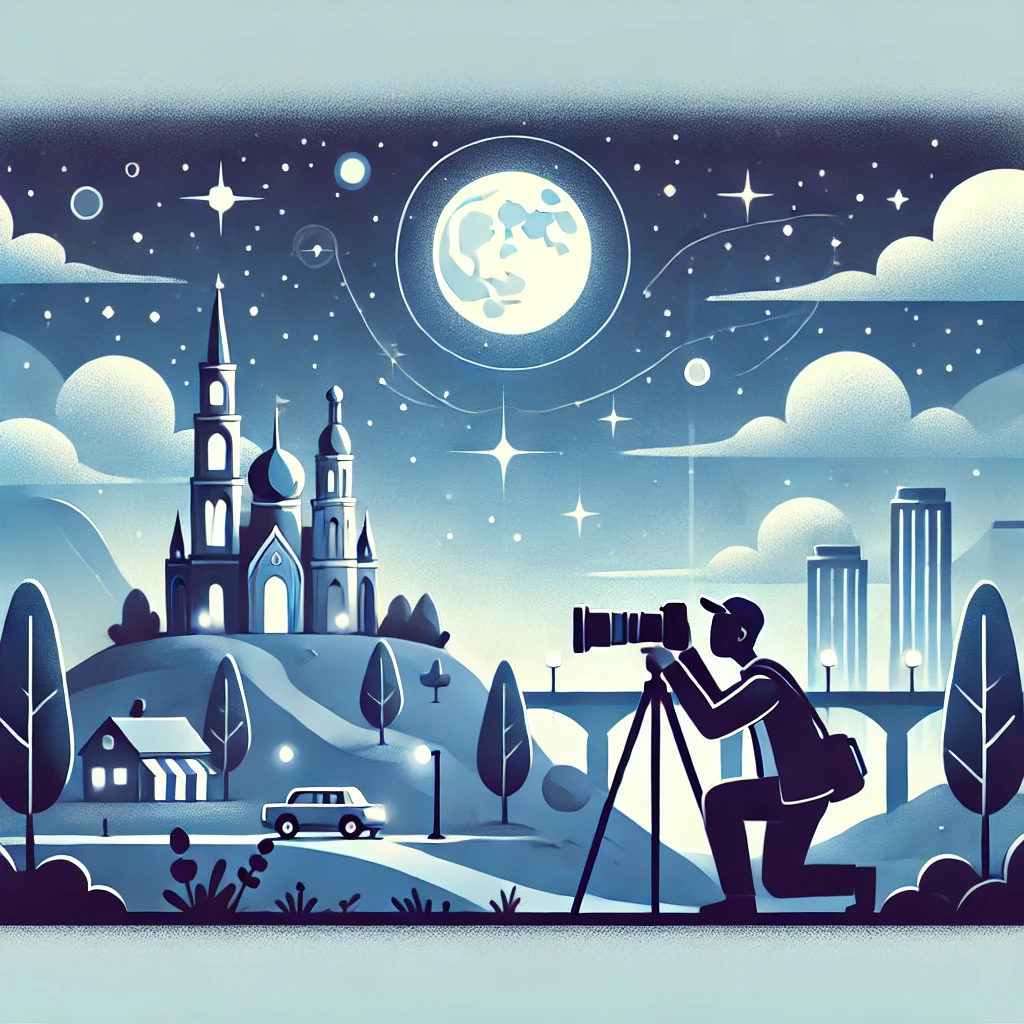
Scout the Location

Before the event, visit the venue to get a sense of the lighting, potential backdrops, and key areas where important activities will occur. This will help you plan your shots and avoid surprises.

Be Prepared With the Right Gear

Ensure you have the right equipment for the event. This typically includes multiple camera bodies, a variety of lenses such as wide-angle, telephoto, and prime lenses, extra batteries, memory cards, and a reliable flash system. Xora’s lightweight, high-capacity battery packs are especially popular among professionals for their durability and performance.

Understand the Event Flow

Familiarize yourself with the event schedule. Knowing the sequence of events helps you anticipate moments worth capturing. Connect with the event organizers to confirm key activities and special moments that cannot be missed.

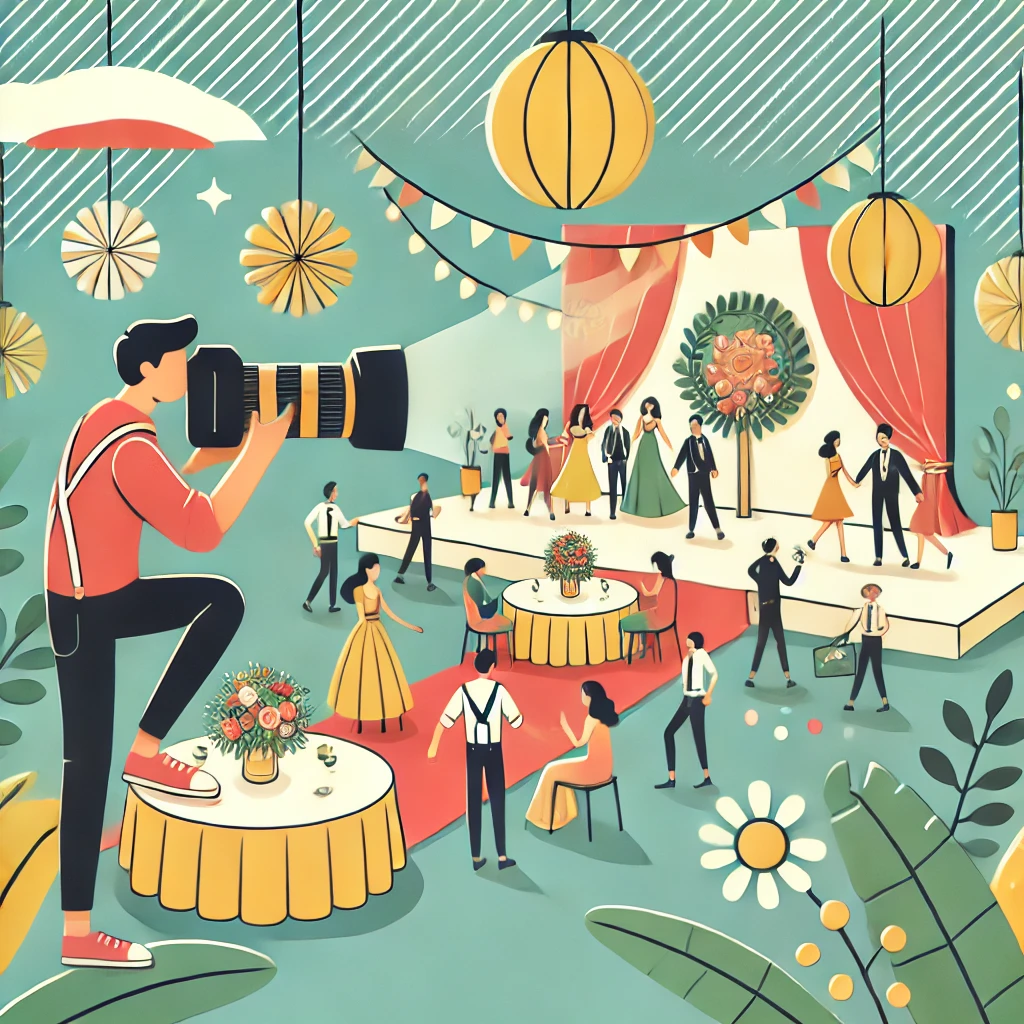
2. Candid Shots: Capturing Genuine Emotions

Candid photography is all about capturing real, unposed moments that convey genuine emotions. Here are some tips to perfect this art:

Blend Into the Background

To catch people behaving naturally, you need to be as unobtrusive as possible. Wearing neutral clothing and moving quietly helps you blend into the background, making attendees more comfortable and less aware of the camera.

Use a Longer Lens

A telephoto lens allows you to photograph subjects from a distance without them noticing, ensuring authenticity in your shots. The Xora 70-200mm f/2.8 telephoto lens is highly recommended for its excellent zoom capabilities and image stabilization features.

Always Be Ready

Candid moments happen in the blink of an eye. Keep your camera settings dialed in for quick adjustments to lighting conditions and be ready to shoot at a moment’s notice. Use continuous shooting mode to capture a sequence of moments, ensuring you get the perfect shot.

Here is an incredible guide for capturing emotions during event photography.

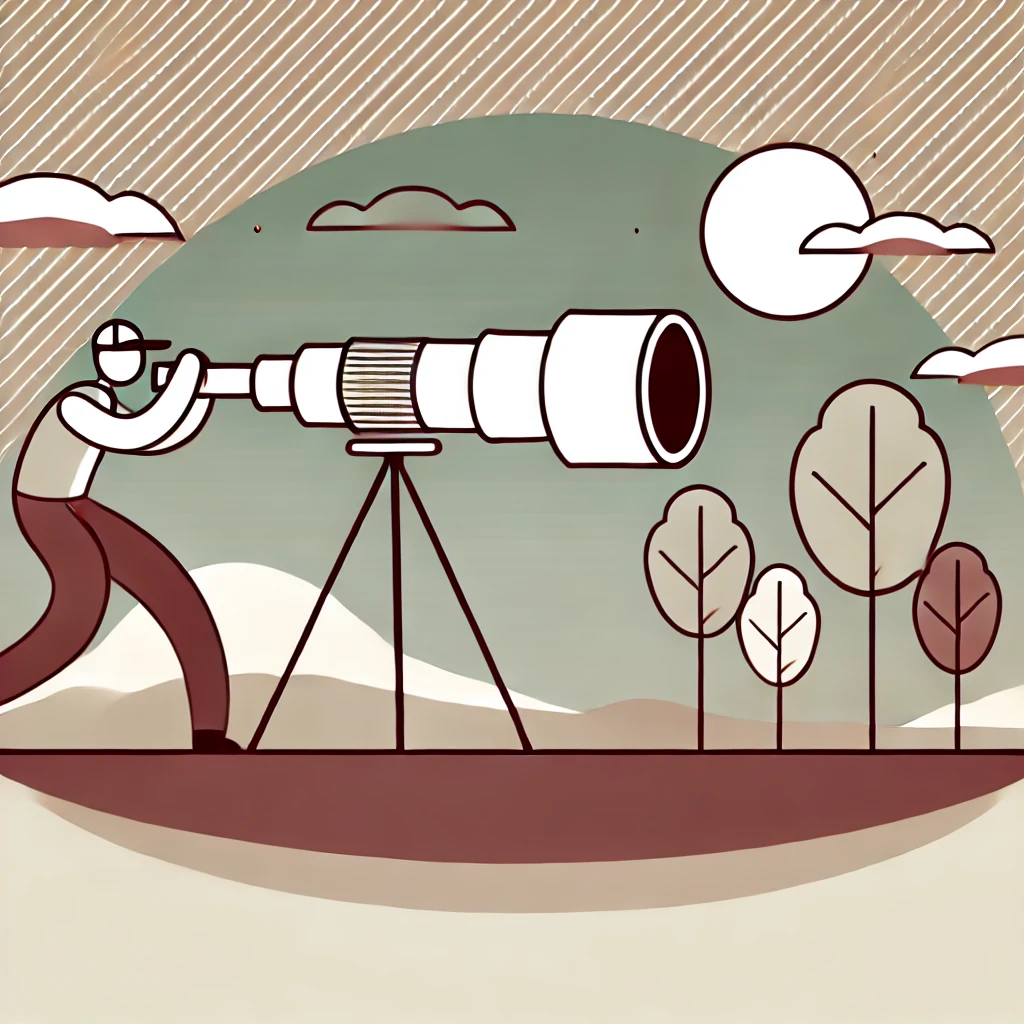
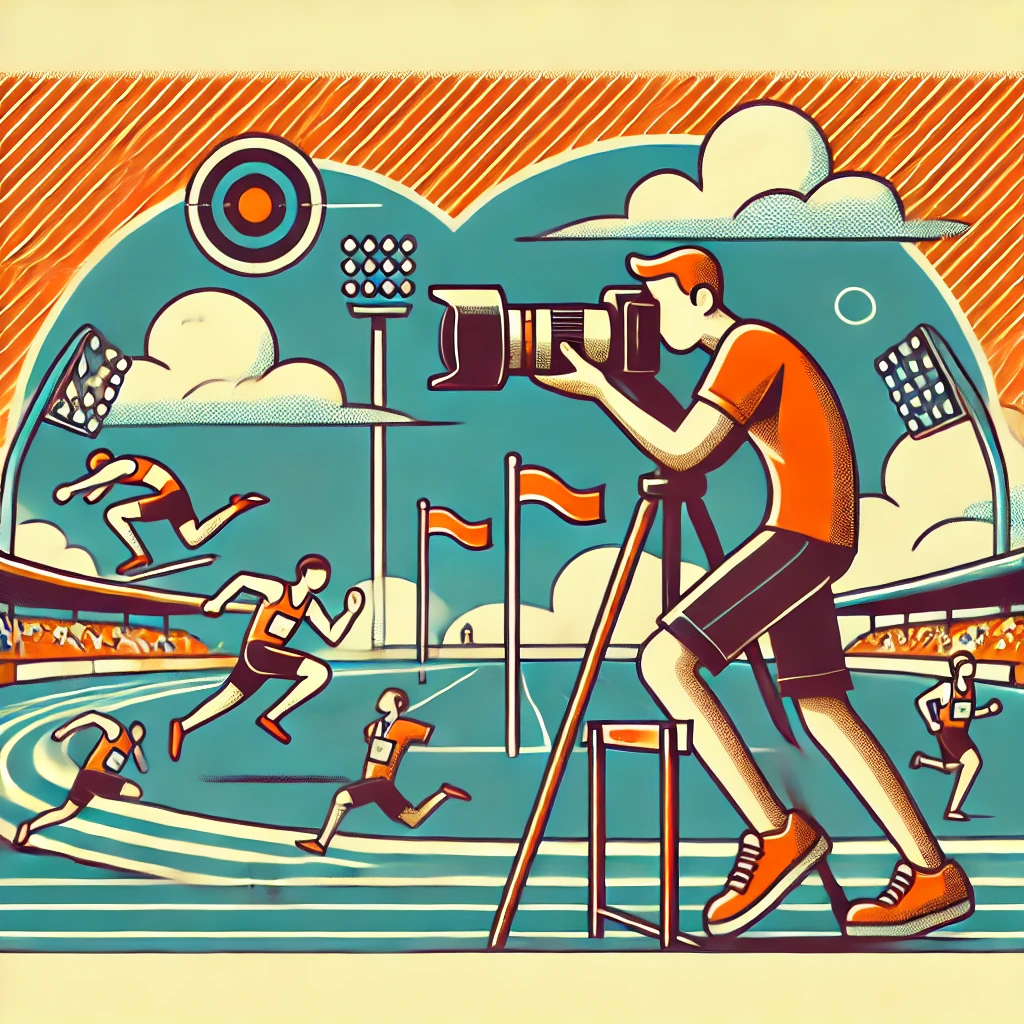
3. The Power of a Telephoto Lens

Telephoto lenses are indispensable for event photography, especially in large venues or crowded spaces. Here’s why you should consider adding one to your kit:

Get Close Without Intruding in event photography

The primary advantage of a telephoto lens is its ability to zoom in on subjects without physically getting close. This is particularly useful in events where maintaining distance is crucial, such as weddings or conferences.

Isolate Your Subject

Telephoto lenses also provide a shallow depth of field, allowing you to isolate your subject and blur out distracting backgrounds. This enhances the focus on the subject and can create a more dramatic effect.

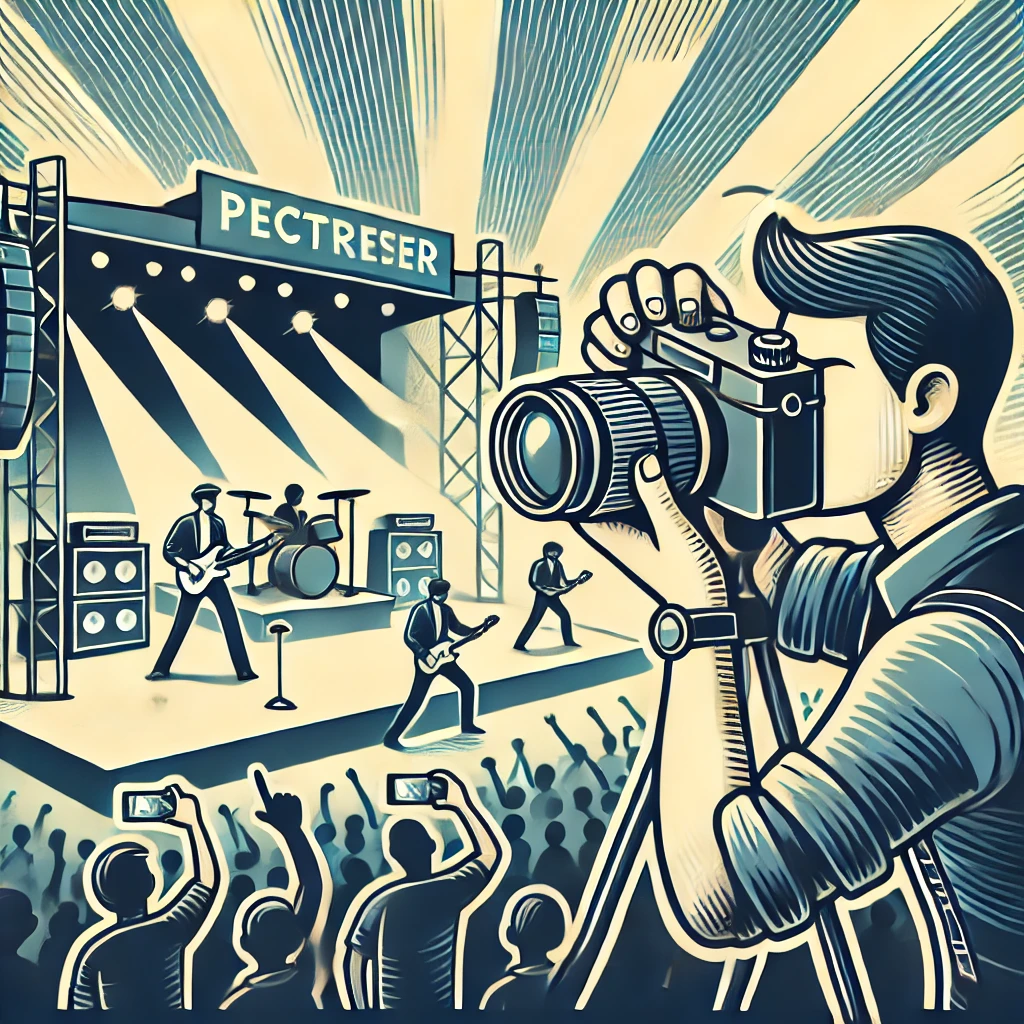
Capture Detailed Shots

A high-quality telephoto lens, like the Xora 70-200mm f/2.8, can capture intricate details even from a distance. This is perfect for photographing speakers at a conference or performers on stage where you can’t get physically close.

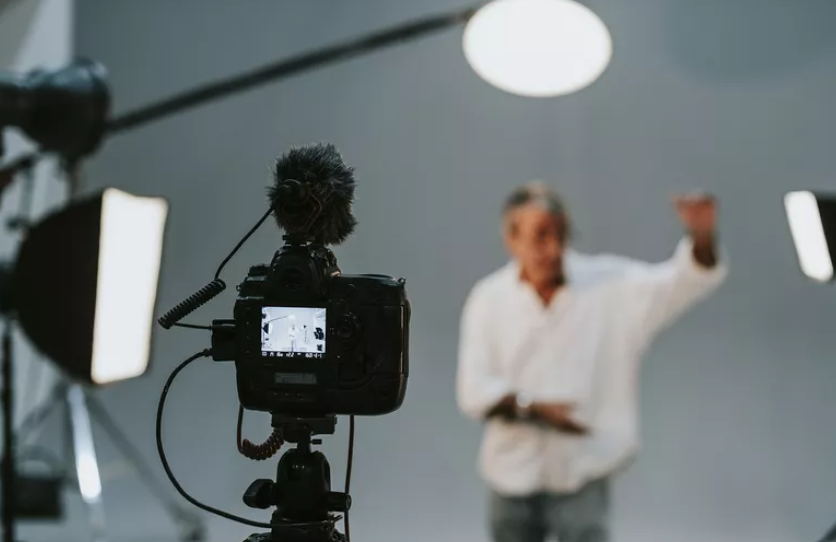
4. Flash Diffuser: Softening the Light

Direct flash can create harsh, unflattering light. Using a flash diffuser can make a significant difference in the quality of your images:

Softening Harsh Light

A flash diffuser spreads out the light from your flash, creating a softer, more even illumination. This helps in reducing harsh shadows and highlights, resulting in more natural-looking photos.

Bounce Your Flash

Another technique to soften light is to bounce your flash off a ceiling or wall. This can be combined with a flash diffuser for an even softer effect. The Xora Flash Diffuser is designed to attach easily and work seamlessly with Xora Flash systems, providing high-quality lighting for any situation.

Maintain Natural Colors

Using a diffuser can help in maintaining the natural colors of the scene. Direct flash can wash out colors and make them appear unnatural. A diffuser helps preserve the original hue and tonality, making your photos more vibrant and true to life.

Additional Tips for Exceptional Event Photography

While the four tips highlighted above are crucial, here are some additional recommendations to elevate your event photography:

l
4 Tips for Incredible Event Photography: Unleash Your Creative Genius and Capture Unforgettable Moments 2

Use Continuous Shooting Mode

This mode allows you to capture multiple frames per second, increasing your chances of getting the perfect shot, especially during fast-moving or unpredictable moments.

Post-Processing

No matter how good your initial shots are, post-processing can enhance them further. Tools like Adobe Lightroom or Photoshop can help you adjust exposure, color balance, and sharpness. Keep it natural, and don’t overdo the editing.

Client Communication

Always maintain clear communication with your clients. Understand their expectations, preferences, and the moments they consider most important. This ensures satisfaction and builds trust.

Conclusion

Mastering event photography involves a blend of preparation, skill, and the right equipment. By focusing on preparation, honing your candid photography skills, utilizing a telephoto lens, and employing flash diffusers, you can significantly enhance your event photography. Remember, every event is unique, and each moment is irreplaceable. For the best results, ensure you are always prepared and ready to adapt to any situation.

Are you ready to take your event photography to the next level? Try Xora to manage all aspects of your business today with a free trial and a money-back guarantee.

Interested in more photography tips? Check out our blog section for more articles.

5 Enlightening Boudoir Photography Tips: Unleash Your Inner Artist and Create Jaw-Dropping Images!

Boudoir Photography
5 Enlightening Boudoir Photography Tips: Unleash Your Inner Artist and Create Jaw-Dropping Images! 3

Introduction

Boudoir photography is a captivating art form that celebrates sensuality, elegance, and self-expression. Whether you’re a seasoned professional or just starting, implementing these five enlightening tips can help you create jaw-dropping images that leave a lasting impression. In this article, we will explore how to make your boudoir photoshoots more effective by focusing on key aspects such as creating a comfortable environment, mastering communication, perfecting posing, leveraging lighting, and selecting the right props and wardrobe. Let’s dive in and unleash your inner artist!

1. Create a Comfortable Environment

The Importance of Comfort

One of the most crucial elements in boudoir photography is ensuring that your subject feels comfortable and relaxed. A comfortable environment sets the stage for natural and confident poses.

Setting Up the Space

Consider the setup of the space where you’ll be shooting. Opt for cozy, intimate settings that make your subject feel at ease. Soft furniture, warm lighting, and soothing music can work wonders.

Establishing Rapport

Invest time in getting to know your subject before the shoot. Engage in casual conversation to break the ice and build trust. When your subject feels comfortable, it will reflect in their expressions and body language, leading to more authentic images.

2. Master the Art of Communication

Pre-Shoot Consultations

Effective communication starts even before the photoshoot. Schedule pre-shoot consultations to discuss your subject’s expectations, preferences, and any insecurities they may have.

Giving Clear Directions

During the shoot, provide clear and positive feedback. Encourage your subject by giving them guidance on poses and facial expressions. Remember, confidence is key in creating stunning boudoir images.

Listening and Adapting

Listen to your subject’s comfort levels and be adaptable. Sometimes, a spontaneous idea from your subject can lead to magical moments. Always be open to their input and ready to adapt.

3. Perfecting Posing Techniques

crm
5 Enlightening Boudoir Photography Tips: Unleash Your Inner Artist and Create Jaw-Dropping Images! 4

Understanding Body Shapes

Understanding different body shapes and knowing how to highlight your subject’s best features is essential in boudoir photography. Everybody is unique, and there is beauty in all forms.

Creating Flattering Poses

Experiment with various poses to find what works best for your subject. Angles, posture, and the position of limbs can dramatically alter the look of your photos. Encourage your subjects to elongate their neck and point their toes for more aesthetically pleasing lines.

The Power of Movement

Capturing movement can add a dynamic and natural feel to your images. Encourage subtle shifts in pose and position, and be ready to snap those candid moments that often turn out to be the most captivating.

4. Harnessing the Right Lighting

Natural vs. Artificial Lighting

Lighting is a game-changer in boudoir photography. Utilize natural light wherever possible for soft, flattering images. Pay attention to how the light interacts with the subject’s skin and surroundings.

Studio Lighting Techniques

If you prefer studio setups, invest in quality lighting equipment. Softboxes and ring lights can provide even, diffused light that enhances the subject’s features. Experiment with shadows and highlights to add depth and drama to your photos.

Creative Light Sources

Don’t be afraid to get creative with light sources. Fairy lights, candles, or even glow sticks can create unique and enchanting effects. Play around with different light placements to discover what works best for your artistic vision.

5. Selecting Props and Wardrobe

Choosing the Right Props

Props can add a layer of depth and personality to your boudoir photos. Consider using objects that resonate with your subject’s interests or personal style. Vintage furniture, delicate lace, or elegant jewellery can enhance the storytelling aspect of your images.

Wardrobe Tips

Guide your subjects in selecting outfits that make them feel confident and beautiful. Lingerie, elegant robes, or even their favourite oversized sweater can create stunning visuals. Offer a variety of options to suit different moods and looks.

Personalization and Themes

Personalization goes a long way in boudoir photography. Discuss themes or ideas that your subject is passionate about, and incorporate elements that reflect their personality. This approach not only makes the shoot more enjoyable but also results in memorable, unique images.

Relevant Statistics and Data

According to a recent survey, 85% of clients reported a significant boost in confidence after participating in a boudoir photoshoot. This statistic underscores the impact that a well-executed boudoir session can have on an individual’s self-esteem. If you have been thinking of more reasons to get a boudoir photography session, here are some more reasons for them.

For more tips and tricks on photography and how Xora can help, check out our other photography tips blog articles.

Conclusion

In conclusion, mastering boudoir photography requires a blend of technical skill, creativity, and empathy. By focusing on creating a comfortable environment, mastering communication, perfecting posing techniques, harnessing the right lighting, and selecting suitable props and wardrobe, you can create jaw-dropping images that resonate deeply with your subjects. Remember, your role as a photographer is to make your subjects feel empowered and beautiful.

Are you ready to take your boudoir photography to the next level? Try Xora today with our free trial and explore the difference. Enjoy a money-back guarantee if you’re not completely satisfied. Capture breathtaking moments and create unforgettable memories with Xora!

5 Unforgettable Tips for Capturing Candid Moments: Transform Your Photography Forever!

candid moments
5 Unforgettable Tips for Capturing Candid Moments: Transform Your Photography Forever! 5

Introduction

Capturing candid moments in photography brings true emotions, authenticity, and real-life stories into your images. Whether you’re an aspiring photographer or a seasoned pro, mastering the art of candid photography can deeply transform your work. In this article, we’ll reveal 5 unforgettable tips for capturing candid moments that will elevate your photography skills. Get ready to learn expert techniques such as being invisible, having quick reflexes, using silent mode, utilizing a telephoto lens, and leveraging continuous mode. Let’s dive in!

Be Invisible

Blend Into the Background

One of the most essential skills in candid photography is to blend into the background. By doing so, you can capture genuine reactions and interactions without disrupting the scene. Wearing neutral-coloured clothing and minimal accessories can help you stay unnoticed.

Act Naturally

When photographing in public spaces, act naturally and confidently. People are less likely to notice you if you appear to belong in the environment.

Utilize the Environment

Use surroundings like trees, walls, or other objects to hide or partially conceal yourself. This technique allows you to capture candid moments up-close without being detected.

Quick Reflexes

Practice Anticipating Actions

Anticipating actions before they happen is key to snapping candid pictures at the right moment. Study human behavior and practice predicting what might happen next. This skill improves over time and with experience.

Stay Alert

Always be ready to capture unexpected moments. Keep your camera turned on and set to the correct settings so you’re prepared to shoot instantly. Quick reflexes ensure you don’t miss fleeting moments.

Silent Mode

Disable Camera Sounds

Camera sounds can be distracting and draw attention to you. Most cameras have a silent or quiet shooting mode; make sure to enable this feature to remain inconspicuous.

Invest in Quiet Equipment

Some cameras and lenses are specifically designed to operate quietly. Investing in such equipment can enhance your ability to capture candid moments without being noticed. Here is a great article about cameras with the quietest shutters.

Telephoto Lens

Telephoto lens
5 Unforgettable Tips for Capturing Candid Moments: Transform Your Photography Forever! 6

Maintain Distance

A telephoto lens allows you to maintain a comfortable distance from your subjects while capturing intimate moments. This lens is especially useful in candid photography, as it prevents subjects from feeling self-conscious.

Capture Natural Expressions

With a telephoto lens, you can capture natural expressions and interactions without intimidating your subjects. This technique is perfect for photographing events, wildlife, or street scenes.

Continuous Mode

Why Use Continuous Mode?

Continuous mode, also known as burst mode, allows your camera to take multiple shots in quick succession. This feature is particularly useful for candid photography as it helps you capture the perfect moment from a series of actions.

Increase Your Chances

Using continuous mode increases your chances of getting the best shot, especially in fast-paced situations. Review the stack of images later to select the perfect candid moment.

Additional Tips for Capturing Candid Moments

Know Your Camera

The more familiar you are with your camera’s settings and functions, the quicker you’ll be able to adjust and react in real-time situations. Practicing regularly is essential to mastering candid photography.

Respect Privacy

Always respect your subjects’ privacy. If someone feels uncomfortable being photographed, be considerate and ask for their permission if necessary. As a photographer, ethical practices are crucial in building trust and reputation.

Conclusion

Mastering the art of capturing candid moments can transform your photography forever. By applying these 5 unforgettable tips—being invisible, having quick reflexes, using silent mode, utilizing a telephoto lens, and leveraging continuous mode—you’ll be well on your way to creating breathtaking, authentic images. Start practicing these techniques today and witness the incredible transformation in your work.

Ready to take your photography to the next level? Try Xora’s latest end-to-end business management tools that manages all aspects of your photography business. Try it with a free trial and a money-back guarantee. Discover why professional photographers trust Xora for capturing stunning candid moments.

For more photography tips and tutorials, check out our blog and stay updated with the latest trends. For additional photography resources and community support, visit our photography articles

4 Tips for Dynamic Concert Photography: Transform Your Shots with These Must-Know Secrets!

concert-photography-tips

Introduction: Master the Art of Concert Photography

Concert photography is an exhilarating yet challenging field. The energy, the lights, the music – capturing these elements perfectly requires skill and practice. In this article, we’ll reveal four essential tips that will help you take better concert photos, transforming your shots into captivating visual stories. Whether you’re a seasoned professional or just starting, these strategies can elevate your concert photography game. Let’s dive in

Additional Mentions in Content

  1. Low-Light Mastery: Among the top is mastering low-light settings. Concerts often have challenging lighting, so adjusting your ISO, shutter speed, and aperture is key to capturing clear shots.
  2. Capturing Emotion: A crucial is to capture the emotion of both performers and the audience. Focusing on expressive faces and powerful gestures will bring the concert’s spirit to life.
  3. Using Burst Mode: Another effective is to use burst mode for fast-paced moments. This helps you capture the best action in a series of shots.
  4. Experimenting with Angles: One of the most impactful is to play with angles. Shooting from different perspectives adds depth and makes your images stand out.

1. Utilize Fast Shutter Speed for Crisp Images

One of the primary hurdles in concert photography is capturing clear images in a dynamic setting. Fast shutter speed is your best friend here.

Why Fast Shutter Speed Matters

A fast shutter speed (e.g., 1/250s or faster) freezes motion, allowing you to capture crisp, clear images even in low-light conditions typical of concerts. This setting minimizes motion blur, especially when photographing fast-moving performers.

How to Set Fast Shutter Speed

While setting up your camera, switch to Shutter Priority mode (Tv/S). This mode lets you choose the desired shutter speed while the camera automatically adjusts the aperture. Use a low f-stop number (such as f/2.8) to allow more light into the lens.

Pro Tip

Shooting in continuous mode can increase your chances of capturing the perfect moment. Experiment with different shutter speeds to find the sweet spot for each concert environment.

2. Master Low Light Settings

Concerts often feature unpredictable lighting. Learn to navigate low-light conditions to ensure your photos stand out.

ISO Settings for Low Light

ISO determines your camera sensor’s sensitivity to light. In low-light settings, increase your ISO to 1600 or 3200. However, be cautious of noise – unwanted graininess in your images.

Aperture Control

Using a lens with a wide aperture (low f-stop number like f/1.8 or f/2.8) allows more light to hit the sensor, essential in low-light environments. Lenses like the Xora Prime 35mm are excellent for this purpose, offering a perfect balance of wide aperture and sharpness.

White Balance Adjustment

Concert lighting varies dramatically. Manually adjusting white balance, or using presets like ‘Incandescent’ or ‘Tungsten,’ can help keep colors accurate. The Xora X-Pro Mirrorless camera features customizable white balance settings that adapt quickly to changing concert lights.

3. Perfect Your Positioning

Your position at a concert greatly affects your shots. Here’s how to find the best vantage points.

Scouting the Venue

Arrive early and scout the venue. Identify the stage layout, light sources, and possible obstacles. If allowed, experiment with different spots during the soundcheck.

Close but Not Too Close

Being close to the stage can offer intimate shots, but avoid being too close as it can limit your angle options. Mid-range lenses such as the Xora 24-70mm f/2.8 are ideal for flexibility in framing from a moderate distance.

Consider the Crowd

Include audience reactions for storytelling. They add depth and context to your images. Capture moments where the crowd interacts with the performers for a more dynamic shot.

4. Anticipate the Action

Great concert photos often come from anticipating key moments. Here’s how to stay one step ahead.

Know the Music

If you follow the band or performer, you’re likely familiar with their setlist and performance style. Use this knowledge to anticipate climactic points in songs where dynamic movements or special effects are likely.

Continuous Shooting Mode

Activate continuous shooting to capture multiple frames per second. This increases your chance of snapping the perfect moment. The Xora X-Pro Mirrorless offers up to 20 frames per second, ensuring you won’t miss any crucial action.

Be Patient

Concert photography requires patience. Wait for the right moments when the performers are most animated or the lights are perfectly aligned. Sometimes, the best shots come from waiting for the split-second where everything falls into place.

Additional Tips for Enhancing Concert Photography

Use Manual Focus

Autofocus might struggle in low light. Switching to manual focus gives you more control, ensuring your subjects remain sharp in unpredictable lighting.

Editing Your Photos

Post-processing is crucial. Use software like Adobe Lightroom to adjust exposure, contrast, and color balance. Fine-tuning your photos can turn a good shot into a great one.

Back Up Your Photos

Always back up your work. Cloud services and external hard drives are essential to avoid losing your images.

Additionally, concert photography in India is its own beast.

The Ultimate Guide to Concert Photography in India

Concert Photography Tips
4 Tips for Dynamic Concert Photography: Transform Your Shots with These Must-Know Secrets! 2

Concert photography is an exhilarating and challenging genre that combines the excitement of live music with the art of capturing fleeting moments. India, with its vibrant music scene and diverse array of concerts, provides a unique backdrop for photographers looking to hone their skills. From Bollywood performances and classical music festivals to rock concerts and indie gigs, there’s always something happening. This guide will provide you with essential tips and techniques to excel at concert photography in India.

1. Research the Venue and Artists

Before heading to a concert, it’s crucial to do some research:

  • Venue Layout: Understand the layout of the venue to plan your shooting positions. Knowing the location of the stage, lighting setups, and possible obstructions can help you choose the best spots.
  • Artists and Performances: Familiarize yourself with the artists and their performance styles. Knowing when the key moments might happen, such as solos or special effects, allows you to be ready to capture them.

2. Gear Up with the Right Equipment

Having the right gear can make a significant difference in concert photography. Here’s what you need:

  • Camera Body: A camera with excellent low-light performance is essential for concerts. Full-frame DSLRs or mirrorless cameras are ideal.
  • Lenses: Fast lenses with wide apertures (f/2.8 or lower) are crucial. Prime lenses like 50mm f/1.8 or 85mm f/1.4 and zoom lenses like 24-70mm f/2.8 or 70-200mm f/2.8 are popular choices.
  • Extra Batteries and Memory Cards: Concerts can be long, and you’ll be shooting a lot, so make sure you have spares.

3. Master Your Camera Settings

Concerts often involve low light and fast-moving subjects, making it challenging to get sharp, well-exposed images. Here are some tips:

  • ISO: Increase your ISO to ensure your shutter speed is fast enough to freeze motion. Modern cameras handle high ISO levels quite well, so don’t be afraid to push it.
  • Aperture: Use a wide aperture to let in as much light as possible. This also helps in creating a shallow depth of field, isolating the subject from the background.
  • Shutter Speed: Aim for a shutter speed of at least 1/250th of a second to freeze action. Adjust based on the movement and lighting conditions.
  • Shooting Mode: Use manual mode to have full control over your settings, or aperture priority mode if you need to quickly adapt to changing lighting conditions.

Here is a great article for beginners learning about concert photography.

4. Focus on Composition

Composition can make or break a photo. Here are some tips for better composition in concert photography:

  • Rule of Thirds: Use the rule of thirds to place your subject off-center, creating a more dynamic image.
  • Leading Lines: Use elements like stage lights, instruments, or the performer’s body to lead the viewer’s eye into the frame.
  • Close-Ups and Wide Shots: Mix close-up shots of the performers with wide shots of the stage and crowd to tell a complete story.

5. Capture the Energy and Emotion

Concerts are about energy and emotion. Your photos should reflect that:

  • Expressions and Gestures: Focus on the performers’ facial expressions and body language. These moments convey the passion and energy of the performance.
  • Crowd Reactions: Capture the audience’s reactions and interactions. Shots of the crowd can add context and convey the atmosphere of the concert.
  • Special Effects: Take advantage of special effects like lighting changes, smoke, and confetti. These elements can add drama and excitement to your photos.

6. Respect the Venue and Performers

Always respect the rules of the venue and the performers. Here are some guidelines:

  • Follow Venue Rules: Some venues have restrictions on flash photography or certain types of cameras. Always adhere to these rules.
  • Be Discreet: Try not to obstruct the view of other concert-goers or distract the performers. Use a telephoto lens to capture close-ups without getting too close to the stage.
  • Get Permission: If you plan to publish your photos, ensure you have the necessary permissions from the venue and the artists.

7. Post-Processing

Post-processing is an essential part of concert photography. Here are some tips:

  • Noise Reduction: Use software like Adobe Lightroom or Photoshop to reduce noise, especially in high ISO images.
  • Adjust Exposure: Fine-tune the exposure, highlights, and shadows to bring out the best in your photos.
  • Enhance Colors: Concert lighting can produce vibrant colors. Enhance these colors to reflect the mood of the performance.

Conclusion: Ready to Elevate Your Concert Photography?

Improving your concert photography skills boils down to preparation, understanding your gear, and practicing anticipation. By applying these four tips—utilizing fast shutter speeds, mastering low light settings, perfecting your positioning, and anticipating the action—you’ll transform your concert shots into stunning visual narratives.

Ready to elevate your concert photography? Visit Xora for more tips, tutorials, and resources to help you become a better photographer. Happy shooting!

Happy shooting, and may your next concert photos be your best yet!

WhatsAppFacebookXLinkedInEmailShare

5 Game-Changing Tips for Capturing Stunning Silhouettes: Elevate Your Photography Skills Today!

Silhouette photography

Introduction

Capturing stunning silhouettes is an art form that can transform an ordinary photo into something truly extraordinary. Silhouettes emphasize shape, form, and contrast, creating a dramatic and timeless look. This comprehensive guide reveals five game-changing tips to elevate your silhouette photography skills. Silhouette Photography Tips By focusing on techniques like backlighting, simple backgrounds, profile shots, sunset/sunrise captures, and post-processing, you’ll be well on your way to capturing breathtaking silhouettes. Whether you’re a seasoned pro or a novice, these tips will help you master the craft of silhouette photography.

Understanding Silhouette Photography

Silhouettes
5 Game-Changing Tips for Capturing Stunning Silhouettes: Elevate Your Photography Skills Today! 2

Silhouette photography involves capturing a subject in shadow, with a brightly lit background. This technique creates striking images where the subject is fully darkened, emphasizing its outline against a luminous background. To effectively capture silhouettes, it’s essential to understand the key factors and strategies that make them stand out.

Backlighting: The Foundation of Silhouette Photography

Backlighting is the cornerstone of silhouette photography. Positioning your light source behind your subject creates a stark contrast between the darkened subject and the illuminated background.

1. **Positioning the Light Source:**

Always place the light source, such as the sun, directly behind your subject to ensure they appear as a dark silhouette. If you’re using artificial light, place it strategically to achieve the same effect.

2. **Camera Settings:**
Use manual settings to control the exposure. Lower the exposure setting to ensure your background is well-lit while your subject remains underexposed. For best results, use a low ISO and a narrow aperture to enhance the contrast.

3. **Experiment with Angles:**
Don’t be afraid to experiment with different angles and perspectives. Sometimes, a slight change in angle can significantly impact the overall composition and feel of your silhouette photo.

Simple Backgrounds: Less is More

A cluttered or distracting background can detract from the impact of a silhouette. A simple, clean background ensures that the silhouette remains the focal point.

1. **Choosing the Right Background:**
Look for backgrounds with minimal distractions. Open skies, walls, or large bodies of water make excellent backgrounds as they tend to be uniform and unobtrusive.

2. **Natural vs. Man-Made Backgrounds:**
Both natural and man-made backgrounds can work well for silhouettes, depending on the mood you wish to convey. A serene ocean will create a different feel compared to an urban skyline.

3. **Leveraging Negative Space:**
Use negative space effectively to make your silhouette stand out even more. The more simplified the background, the stronger the silhouette’s impact will be.

Profile Shots: Capturing the Essence

Profile shots often create some of the most compelling silhouettes, highlighting the unique features and emotions of your subject.

1. **Framing the Subject:**
Frame your subject in profile to maximize the definition of their form. Ensure key characteristics, such as facial features or body shape, are clearly outlined against the background.

2. **Telling a Story:**
Profile silhouettes can be particularly effective for storytelling. The posture, gesture, and positioning of your subject can convey a range of emotions and narratives.

3. **Adding Dimension:**
Experiment with different positions of your subject relative to the light source to add depth and dimension to your silhouette. Sometimes, a slight tilt or turn can add significant interest to your profile shots.

Sunset/Sunrise: Nature’s Best Backlight

Sunset and sunrise provide the perfect natural lighting for capturing breathtaking silhouettes. The sky’s gradient from light to dark enhances the overall dramatic effect.

1. **Timing Is Key:**
The best time for silhouette photography is during the golden hour – shortly after sunrise or just before sunset. The sun’s lower angle casts long shadows and provides a beautiful soft light.

Head to this golden hour calculator to understand the exact time for golden hour photography in your area.

2. **Vibrant Skies:**
Aim for days when the sky is clear or only slightly cloudy. The colors during sunrise and sunset can range from fiery oranges to soft pinks, making your silhouettes even more striking.

3. **Experiment with Composition:**
Use the sun as part of your composition. Placing the sun directly behind your subject can create a magnificent halo effect, whereas positioning it slightly to the side can add interesting lighting dynamics.

Post-Processing: Fine-Tuning Your Image

While capturing a great silhouette in-camera is ideal, post-processing can enhance the final image by adjusting brightness, contrast, and colors.

1. **Software Tools:**
Use photo editing software such as Adobe Lightroom or Photoshop to make fine adjustments. These tools allow you to manipulate various aspects of your image, such as exposure, shadows, and highlights.

2. **Enhancing Contrast:**
Increasing the contrast will deepen the silhouette effect. Adjusting the blacks and shadows can also help to ensure that the subject stands in stark contrast to the background.

3. **Color Correction:**
Fine-tune the colors to either enhance the natural hues of the sunset/sunrise or create a specific mood. Color grading can dramatically alter the overall feel of your silhouette photograph.

4. **Sharpening Details:**
Use sharpening tools to bring out finer details in the edges of your silhouette, ensuring that your subject’s outline is crisp and well-defined.

Conclusion

Capturing stunning silhouettes is a powerful way to elevate your photography skills. By mastering techniques like backlighting, maintaining simple backgrounds, focusing on profile shots, leveraging the magic of sunset/sunrise, and utilizing post-processing effectively, you’ll create mesmerizing images that stand out. Remember, the key to capturing remarkable silhouettes lies in planning, practice, and experimentation.

Happy shooting!

For more amazing articles to elevate your photography, head to our blog.

Xora allows photographers to focus 100% on their creative work and helps manage 100% of their end-to-end business to keep the clients happy. Start a money back guarantee free trial at Xora

5 Creative Composition Photography Techniques to Transform Your Photography: Unleash Your Inner Artist Today!

Creative Composition Photography Techniques

Introduction: Unleash Your Inner Artist with Creative Composition Photography Techniques

Unleash your inner artist with creative composition photography techniques that bring life to your images. These essential creative composition photography techniques can transform ordinary shots into breathtaking works of art. By mastering creative composition photography techniques, you’ll learn to use framing, leading lines, and symmetry to guide the viewer’s eye and add depth to your photos. Whether you’re capturing landscapes, portraits, or street scenes, these creative composition photography techniques are designed to elevate your skills and inspire new approaches

1. Master the Rule of Thirds

The Rule of Thirds is one of the most fundamental composition techniques in photography. It involves dividing your frame into nine equal parts using two equally spaced horizontal lines and two equally-spaced vertical lines. This creates a grid that helps you position the key elements of your scene along these lines or at their intersections.

Why the Rule of Thirds Works

The Rule of Thirds works because it creates a more balanced and engaging composition. By placing your subject off-centre, you add tension, interest, and movement to your photo. This simple technique can make a significant difference in how your images are perceived.

Practical Tips for Using the Rule of Thirds

  • Enable the grid on your camera: Most cameras and smartphones have a grid option in the settings. Turn it on to help you compose your shots.
  • Practice with different subjects: Experiment with landscapes, portraits, and still life to see how the Rule of Thirds can improve your compositions.
  • Combine with other techniques: Use the Rule of Thirds in conjunction with other composition methods like leading lines and framing for even more compelling photos.

2. Utilize Leading Lines

Leading lines are lines within an image that lead the viewer’s eye to a particular point of interest. They can be straight, curved, diagonal, or zigzag lines and can be found in both natural and man-made environments.

How Leading Lines Enhance Composition

Leading lines guide the viewer through the image, creating a sense of depth and three-dimensionality. They can draw attention to your main subject or create a visual journey that keeps the viewer engaged.

Finding and Using Leading Lines

  • Look for natural lines: Rivers, roads, and pathways are excellent examples of natural leading lines.
  • Use architecture: Buildings, bridges, and fences often have lines that can be used creatively in your compositions.
  • Experiment with perspective: Change your shooting angle to make the most of leading lines. Low or high angles can provide unique and interesting views.

3. Embrace Symmetry and Patterns

Symmetry and patterns can create visually striking and harmonious compositions. Symmetry involves mirroring elements on either side of the frame, while patterns are repeating elements that provide a sense of rhythm and consistency.

The Power of Symmetry and Patterns

Symmetry and patterns can evoke a sense of balance, order, and beauty in your photos. They can be found in both natural and urban environments, making them versatile tools for any photographer.

Tips for Capturing Symmetry and Patterns

  • Seek out symmetrical scenes: Look for reflections in water, architectural elements, or natural symmetry in landscapes.
  • Focus on details: Patterns are often found in smaller details like textures, shadows, and foliage.
  • Break the pattern: Sometimes, including a single element that disrupts the pattern can create a more dynamic and interesting composition.

4. Experiment with Framing

Framing involves using elements within the scene to create a “frame” around your subject. This technique draws attention to the main subject and adds depth and context to the image.

Why Framing Works

Framing helps to isolate the subject, making it stand out in the composition. It also provides a sense of place and context, adding layers of meaning to your photograph.

Creative Framing Ideas

  • Use natural frames: Trees, branches, or foliage can act as natural frames for your subject.
  • Incorporate architectural elements: Doorways, windows, and arches are excellent for framing in urban settings.
  • Play with perspective: Move around to find unconventional frames that add a unique touch to your composition.

5. Master the Use of Negative Space

Negative space refers to the empty or unused space around your subject. It can be as important as the subject itself, providing balance, simplicity, and a sense of scale to your composition.

The Benefits of Negative Space

Negative space allows the viewer’s eye to rest and emphasizes the subject by isolating it. It can create a minimalist and elegant look, making your photos more powerful and impactful.

Tips for Effective Use of Negative Space

  • Simplicity is key: Avoid cluttered backgrounds and aim for clean, simple compositions.
  • Focus on contrast: Ensure there is a strong contrast between the negative space and the subject to make it stand out.
  • Experiment with positioning: Try placing the subject in different parts of the frame to see how negative space affects the overall composition.

Conclusion: Elevate Your Photography with Creative Composition Photography Techniques

By mastering these five creative composition photography techniques—Rule of Thirds, Leading Lines, Symmetry and Patterns, Framing, and Negative Space—you can elevate your photography and unleash your inner artist. Remember, practice makes perfect, so experiment with these tips to see what works best for you.

Ready to take your photography to the next level? Try Xora, the leading photo editing software with a free trial and a money-back guarantee. Transform your photos and showcase your artistic vision today!

Internal and External Resources

For more tips and tricks on photography and how Xora can help, check out our other photography tips blog articles.

For further reading, explore this comprehensive article on National Geographic’s photography composition tips.

WhatsAppFacebookXLinkedInEmailShare

4 Must-Know Tips for Mesmerizing Wildlife Photography: Tips for Capturing the Untamed Beauty!

Wildlife Photography Tips

Introduction to Wildlife Photography

Wildlife photography is a thrilling and rewarding art form that brings you up close and personal with the natural world. But capturing those perfect moments doesn’t just happen by chance. It requires a keen eye, the right equipment, and a lot of practice. Whether you are a beginner or an experienced photographer, these 4 must-know tips for better wildlife photography will elevate your skills and help you capture stunning images. In this article, we will delve into tips such as patience, telephoto lenses, silent mode, and fast shutter speeds to transform your shots.

Tip 1: Patience is a Virtue

Why Patience is Essential

When it comes to wildlife photography, patience is not just a virtue; it’s a necessity. Animals are unpredictable, and the perfect shot may take hours or even days to appear. Wildlife Photography Tips . By investing time into waiting for the right moment, you increase your chances of capturing authentic, candid images of animals in their natural habitats.

Strategies to Cultivate Patience

Developing patience can be challenging, but it can significantly improve your wildlife photography. Here are some strategies:

  • Spend more time observing animals rather than trying to photograph them immediately.
  • Practice mindfulness to help remain calm and focused.
  • Carry a comfortable chair or use a hide to make long waits more bearable.

Tip 2: Invest in a Quality Telephoto Lens

The Importance of a Telephoto Lens

A telephoto lens is crucial for wildlife photography. It allows you to capture close-up shots of animals from a distance, minimizing the risk of disturbing them. A lens with a focal length of at least 300mm is recommended for most wildlife scenarios.

Choosing the Right Telephoto Lens

When selecting a telephoto lens, consider the following factors:

  • Focal Length: A longer focal length provides better reach.
  • Aperture: A wider aperture (lower f-number) allows more light, which is advantageous in low-light conditions.
  • Image Stabilization: Look for lenses with image stabilization to reduce camera shake.

Investing in a high-quality telephoto lens may be costly, but it will undoubtedly enhance your ability to capture stunning wildlife photos.

Tip 3: Utilize Silent Mode

Why Silent Mode Matters

Animals are easily startled by sudden noises, including the click of a camera shutter. Using the silent mode on your camera helps minimize disturbances, allowing you to capture more natural behavior.

How to Activate Silent Mode

Most modern cameras come equipped with a silent or quiet mode. Consult your camera’s manual to learn how to activate it. Typically, this function can be found in the settings menu. Silent mode works by either suppressing the mechanical shutter sound or using an electronic shutter.

Silent Mode in Action

Employ silent mode while photographing tranquil or skittish wildlife, such as deer, birds, or smaller mammals. This practice is especially useful during breeding seasons when animals are more cautious.

Tip 4: Embrace Fast Shutter Speeds

The Role of Shutter Speed in Wildlife Photography

In wildlife photography, fast shutter speeds are essential for freezing motion and capturing sharp images of moving animals. Whether it’s a bird in flight or a deer leaping, a quick shutter speed ensures your photos are crisp and clear.

Setting Up for Fast Shutter Speeds

To achieve optimal shutter speeds:

  • Set your camera to Shutter Priority (Tv or S mode).
  • Adjust the shutter speed based on the animal’s movement. For example, use 1/1000th of a second for fast-moving birds.
  • Increase the ISO if lighting conditions are poor. This compensates for the fast shutter speed and ensures your images are not underexposed.

Keep in mind that fast shutter speeds might require wider apertures and higher ISO settings, so balance these elements to maintain image quality.

Additional Pro Tips for Elevating Your Wildlife Photography

Understanding Animal Behavior

Knowledge of animal behavior enhances your ability to anticipate actions and capture remarkable moments. Spend time learning about your subjects—research their habits, peak activity times, and environments. This preparation will enable you to be in the right place at the right time.

Use of Natural Light

Natural light is your best ally in wildlife photography. Golden hours—shortly after sunrise and before sunset—provide soft, warm lighting that can dramatically enhance your photos. Avoid harsh midday light as it can create unwanted shadows and highlights.

Composition Techniques

Effective composition is vital for compelling wildlife photographs. Utilize the rule of thirds, leading lines, and framing to create balanced and engaging images. Keep the background simple to ensure the subject stands out.

Post-Processing Tips

Post-processing is the final touch that can elevate your photos. Use editing software like Adobe Lightroom or Photoshop to adjust exposure, contrast, and colour balance. However, avoid over-editing and strive to keep the images natural.

Exploring India’s Diverse Wildlife

Xora Client Management
4 Must-Know Tips for Mesmerizing Wildlife Photography: Tips for Capturing the Untamed Beauty! 7

India is home to a rich and diverse array of wildlife, making it a paradise for photographers. From the majestic Bengal tigers of the Sundarbans to the elusive snow leopards in the Himalayas, India offers endless opportunities for capturing stunning wildlife images. Here are some tips to help you make the most of your wildlife photography in India.

1. Research and Plan Your Trip

Successful wildlife photography begins with thorough research and planning. Identify the specific species and regions you want to photograph. India has numerous national parks and wildlife sanctuaries, each offering unique photographic opportunities. Some top destinations include:

  • Ranthambore National Park: Famous for its Bengal tigers, Ranthambore is a must-visit for wildlife photographers.
  • Kaziranga National Park: Known for its population of Indian rhinoceroses, Kaziranga provides incredible photo opportunities.
  • Bandhavgarh National Park: Another excellent location for spotting Bengal tigers and a variety of other wildlife.
  • Periyar Wildlife Sanctuary: Offers a chance to photograph elephants in their natural habitat.

2. Use the Right Equipment

For wildlife photography in India, having the right equipment is essential. Here are some key gear recommendations:

  • Telephoto Lenses: A lens with a focal length of at least 300mm is ideal for capturing distant wildlife without disturbing them.
  • Tripod: A sturdy tripod helps stabilize your camera, especially when using heavy telephoto lenses.
  • Bean Bag: Useful for stabilizing your camera when shooting from a vehicle or uneven surfaces.
  • Backup Batteries and Memory Cards: Always carry extra batteries and memory cards to avoid running out of power or storage during critical moments.

3. Understand Animal Behavior

Knowing the behavior of your subjects can greatly enhance your wildlife photography. Spend time observing the animals and learn about their habits, feeding patterns, and interactions. This knowledge will help you anticipate movements and capture more compelling images.

4. Be Patient and Respectful

Wildlife photography requires patience and respect for nature. Avoid disturbing the animals or their habitats. Remain quiet and move slowly to avoid scaring the wildlife. Remember that the welfare of the animals is more important than getting the perfect shot.

5. Optimize Your Camera Settings

To capture stunning wildlife images, optimize your camera settings:

  • Shutter Speed: Use a fast shutter speed to freeze motion, especially for fast-moving animals.
  • Aperture: A wide aperture (low f-stop) helps isolate the subject from the background and works well in low light conditions.
  • ISO: Adjust the ISO to achieve a balanced exposure without introducing too much noise.
  • Continuous Shooting Mode: Enable this mode to capture multiple frames per second, increasing your chances of getting the perfect shot.

6. Make Use of Natural Light

Natural light can dramatically impact your wildlife photos. Early morning and late afternoon provide the best lighting conditions, offering soft, warm light that enhances the details and colors of your subjects. Avoid shooting in harsh midday light, which can create unflattering shadows and highlights.

Conclusion

Mastering wildlife photography requires patience, the right equipment, and attention to detail. By implementing these 4 must-know tips—patience, investing in a quality telephoto lens, utilizing silent mode, and embracing fast shutter speeds—you’ll be well on your way to capturing stunning wildlife images. Remember, continuous learning and practice are key.

Ready to take your wildlife photography in India to the next level? Explore Xora for more tips, tutorials, and tools to enhance your photography skills. Happy shooting!

For more tips and tutorials, check out our other articles on wildlife and nature photography. If you’re looking for authoritative resources, visit the National Geographic Photography page for inspiration and insights.

WhatsAppFacebookXLinkedInEmailShare

5 Tips for Better Sports Photography: Unleash Your Inner Pro with These Game-Changing Secrets

Sports Photography Tips

Introduction to Sports Photography

Sports photography is exhilarating, but it’s far from easy. Capturing the thrilling moments of athletic prowess requires more than just a camera; it demands skill, precision, and a nuanced understanding of the sport you’re photographing. Sports Photography Tips

Whether you’re a seasoned photographer or a beginner looking to improve, this article will provide you with five game-changing secrets to take your sports photography to the next level.

Mastering sports photography tips can elevate your action shots to pro-level quality. Here are 5 game-changing secrets to help you capture the intensity and motion of every moment, bringing your sports photography to life

1. Use a Fast Shutter Speed

Why Fast Shutter Speed is Crucial

When it comes to sports photography, action is the name of the game. Athletes move lightning-fast, and your camera needs to keep up. A fast shutter speed helps you freeze these motions, turning blur into crisp, clear images. For most sports photography, a shutter speed of 1/1000th of a second or faster is ideal.

How to Set Your Shutter Speed for Sports Photography

Most modern cameras come with adjustable shutter speed settings. Navigate to ‘Manual’ or ‘Shutter Priority’ mode and set your shutter speed to a fast level. If you’re not sure what works best, start experimenting with 1/1000th of a second and adjust according to the speed of the action you’re capturing. Remember, most sports photography requires you to blazing fast and so 1/1000th would be a good starting point.

Examples of Fast Shutter Speed in Action

Consider photographing a soccer match. At 1/1000th of a second, you’ll be able to freeze a player mid-kick, capturing the intensity and focus of the moment. In contrast, using a slower shutter speed will result in a blurred image where details are lost.

Here is a great guide for shutter speeds in sports photography.

2. Burst Mode: Never Miss a Moment

What is Burst Mode?

Burst Mode—or continuous shooting mode—enables your camera to take a series of high-speed shots with a single press of the shutter button. This feature is invaluable in sports photography, where key moments happen in split seconds.

How to Utilize Burst Mode Effectively

Activate Burst Mode by accessing your camera’s shooting mode settings. It’s essential to pair Burst Mode with a high-speed memory card to ensure your camera can process and store the rapid sequence of images without lag.

Practical Applications of Burst Mode

Imagine capturing the diverse expressions of athletes during a sprint finish. Burst Mode lets you take multiple shots in quick succession, ensuring you don’t miss that critical moment when the athlete crosses the finish line.

3. Invest in a Telephoto Lens

Why You Need a Telephoto Lens

A telephoto lens is indispensable for sports photography as it allows you to shoot from a distance without sacrificing image quality. A focal length of at least 200mm is recommended for capturing in-detail shots from the sidelines.

Choosing the Right Telephoto Lens

Investing in a high-quality telephoto lens might be costly, but the investment pays off in superior image quality. Canon’s EF 70-200mm f/2.8L IS III USM or Nikon’s AF-S NIKKOR 70-200mm f/2.8E FL ED VR lenses are popular choices among professional sports photographers.

Maximizing Telephoto Lens Performance

Use a monopod to stabilize your shots, especially when using a heavier telephoto lens. It helps in reducing camera shake and thus maintains sharpness in your images. Also, enable image stabilization features if your lens provides them.

4. Anticipate the Action

The Art of Predicting Moments

One of the hallmarks of a great sports photographer is the ability to anticipate the action before it happens. Understanding the game you’re photographing is critical for this.

Tips for Predicting the Action

Watch games, study players, and understand the sport’s rhythm. Knowing common plays and strategies will allow you to predict where the critical moments are likely to occur. Position yourself strategically to capture the action as it unfolds.

Practice Makes Perfect

There’s no substitute for experience. The more you shoot, the better you’ll become at anticipating the action. Attend as many sporting events as possible to hone this skill.

5. Focus Tracking: Keep Your Subject Sharp

What is Focus Tracking?

Focus Tracking, also known as continuous or AI Servo AF, allows your camera to maintain focus on a moving subject. This feature is invaluable for sports photography, where subjects are often in motion.

Setting Up Focus Tracking

Activate Focus Tracking in your camera’s settings. On a Canon camera, switch to ‘AI Servo AF’ mode. For Nikon, you’ll use the ‘Continuous AF’ (AF-C) mode. Ensure that you’re familiar with these settings to quickly adjust them during the action.

Enhance Your Images with Focus Tracking

Utilize the center focus point for best results and practice shooting with different scenarios to become comfortable with how your camera tracks moving subjects. This feature will significantly enhance the precision of your sports shots.

Additional Tips for Enhancing Sports Photography

Understanding Your Camera Settings

Familiarize yourself with all the settings on your camera. This includes ISO settings, aperture, and custom shooting modes, as each plays a vital role in achieving the perfect shot.

Leverage Natural Light

Natural light can significantly impact the quality of your photos. Avoid using a flash as much as possible since it can be disruptive and ineffective in large, open spaces.

Post-Processing Techniques

Even with excellent shooting techniques, a bit of post-processing can go a long way. Utilize software like Adobe Lightroom or Photoshop to fine-tune your images, adjusting brightness, contrast, and color balance to make your photos pop.

Relevant Statistics and Data

Importance of High-Quality Equipment

According to a survey by Professional Photographers of America, 67% of sports photographers believe that high-quality equipment is critical for capturing professional-grade images.

Impact of Shutter Speed on Image Quality

Research shows that using a shutter speed of 1/1000th of a second or higher reduces motion blur by 85%, significantly improving image clarity (Source: Photography Insights Journal, 2022).

Conclusion

Mastering sports photography takes time, practice, and commitment. By utilizing fast shutter speed, burst mode, a telephoto lens, anticipating the action, and focus tracking, you can significantly enhance your skills and results. Remember, the key to success is continuous learning and adapting to new techniques.

Xora allows you to elevate your game, by freeing up your time from business management aspects. Xora offers a free trial with a money-back guarantee, providing you an opportunity to explore and benefit from professional-grade tools without any risk. Happy photographing!


For more tips and tricks, check out our other articles on photography here.


Ready to take your sports photography to the next level? Sign up for a free trial with Xora today and experience the difference!

4 Life-Changing Tips for Breathtaking Night Photography that Will Transform Your Shots

Night Photography
4 Life-Changing Tips for Breathtaking Night Photography that Will Transform Your Shots 8

Introduction to Night Photography

Night photography is a mesmerizing realm of photography that holds immense potential for creating breathtaking images. night photography tips When the sun sets and the city lights begin to glow, an entirely new world surfaces, brimming with opportunities for captivating shots. In this article, we’re diving into four life-changing tips that are guaranteed to transform your night photography. Whether you’re just starting or looking to refine your skills, these insights will help you capture stunning images in low-light conditions. Read on to discover how mastering long exposure, using a tripod, adjusting to low ISO, and employing a wide aperture can elevate your night photography game to new heights.

Tip 1: Master the Art of Long Exposure

Understanding Long Exposure

Long exposure is a technique in photography where the camera’s shutter is left open for a longer duration. This allows more light to hit the sensor, making it ideal for night photography where natural light is scarce. The extended exposure time helps capture more details and creates beautifully illuminated images.

Practical Tips for Long Exposure

Use a Slow Shutter Speed: Depending on the level of darkness, try setting your camera’s shutter speed to several seconds. This will ensure ample light penetration.
Bulb Mode for Flexibility: For maximum control over exposure time, use the bulb mode feature available on most DSLRs and mirrorless cameras. This allows you to manually keep the shutter open for as long as you want.
Avoid Overexposure: Monitor and adjust your settings to avoid overexposure, which can occur when too much light hits the camera sensor, making your images look washed out.

Adobe has published some amazing tips for night photography settings. You can find them here.

Tip 2: Use a Tripod for Stability

The Importance of a Steady Shot

When taking long exposure shots, any small movement can cause motion blur, ruining an otherwise perfect image. A sturdy tripod is a crucial tool that provides the stability needed to capture crisp night photos.

Choosing the Right Tripod

Weight Considerations: Choose a tripod that is heavy enough to remain stable but light enough to carry around. Carbon fiber tripods are usually a good balance.
Height Flexibility: Ensure your tripod can extend to a comfortable shooting height and also collapse for low-angle shots.

Tip 3: Adjust to a Low ISO Setting

Understanding ISO and Its Impact on Night Photography

ISO measures the sensitivity of your camera sensor to light. While high ISO settings allow capturing brighter images in low light, they also introduce noise or grain, which can detract from the image quality.

Tip 4: Employ a Wide Aperture

The Role of Aperture in Night Photography

Aperture controls the amount of light entering your camera lens. A wider aperture (lower f-number) allows more light to hit the sensor, which is essential in low-light settings. It also creates a shallower depth of field, making your subject stand out against a beautifully blurred background.

Additional Tips and Techniques

Beyond the fundamental techniques of long exposure, stable tripod use, low ISO, and wide aperture, there are several additional tips to enhance your night photography.

crm
4 Life-Changing Tips for Breathtaking Night Photography that Will Transform Your Shots 9

Utilize Artificial Light Smartly

Using external light sources like flashlights or LED panels can add depth and creativity to your night shots. Experiment with light painting to create stunning effects.

Explore Manual Focus

Autofocus may struggle in low light. Switch to manual focus and use live view to zoom in on your subject and ensure a sharp focus.

Keep an Eye on the Weather

Weather conditions like fog, mist, or rain can add a dramatic atmosphere to your night photos. Check weather forecasts and plan your shoots accordingly.

Relevant Statistics and Data

night photography tips
4 Life-Changing Tips for Breathtaking Night Photography that Will Transform Your Shots 10

– According to a 2022 survey by Statista, night photography has seen a 45% increase in popularity among photography enthusiasts in the last five years.
– Research by the Digital Photography School indicates that using a tripod can enhance image sharpness by 80% in long-exposure photography.

Conclusion

Night photography opens up a world of creativity and new perspectives that can significantly elevate your photography skills. night photography tips By mastering long exposure, using a tripod, adjusting to low ISO, and employing a wide aperture, you can capture stunning night shots that tell a story. Remember, practice makes perfect, so keep experimenting with these techniques to see what works best for you.

Take all the time you need to master night photography, let Xora free you up from managing your business. Sign up for a free trial with a money-back guarantee and witness the transformation in your night photography.

Beige and Brown Minimalist Simple Working From Home Blog Banner

Photography Invoicing Software: Billing Made Easy for Photographers

images 3
Photography Invoicing Software: Billing Made Easy for Photographers 11

Introduction

In the competitive world of photography, managing your finances can often feel overwhelming. From tracking expenses to ensuring timely client payments, effective financial management is crucial for the success of your photography business. Enter photography invoicing software—a game-changing solution designed to simplify the billing process and streamline your financial operations.

Photography invoicing software not only helps you create and send professional invoices but also tracks payments, manages client communications, and offers valuable insights into your business’s financial health. In this article, we will explore the importance of photography invoicing software, its key features, and the best solutions available to help photographers manage their billing effectively.

Why Photography Invoicing Software is Essential

  1. Streamlined Billing Process: Manual invoicing can be time-consuming and prone to errors. Photography invoicing software automates the billing process, allowing photographers to create, send, and track invoices with ease. This efficiency saves time and reduces the likelihood of mistakes.
  2. Professional Invoices: First impressions matter, and sending a well-designed, professional invoice reflects positively on your brand. Invoicing software typically offers customizable templates that allow photographers to include their branding, ensuring a polished presentation for clients.
  3. Expense Tracking: Many invoicing solutions come with expense-tracking features that enable photographers to categorize and monitor their expenses easily. This functionality helps in understanding profitability and managing budgets effectively.
  4. Payment Tracking: Keeping track of payments can be challenging, especially if you have multiple clients and projects. Invoicing software often includes payment tracking features, allowing you to see which invoices have been paid, which are outstanding, and when payments are due.
  5. Time Management: With automated invoicing, photographers can focus more on their creative work rather than getting bogged down in administrative tasks. This efficiency leads to better time management and increased productivity.

Key Features of Photography Invoicing Software

When selecting photography invoicing software, it’s essential to look for features that enhance your billing process. Here are some key functionalities to consider:

photography invoicing software
Photography Invoicing Software: Billing Made Easy for Photographers 12
  1. Customizable Invoice Templates
    • Branding Options: Look for software that allows you to customize invoice templates with your logo, colors, and fonts. This personalization helps create a consistent brand image and a professional appearance.
    • Itemized Billing: The ability to itemize services and products on your invoices is crucial for transparency. Clients appreciate seeing a breakdown of charges, which helps avoid confusion and disputes.
  2. Automated Payment Reminders
    • Timely Notifications: Set up automated reminders to notify clients about upcoming payments or overdue invoices. This feature helps ensure timely payments and reduces the chances of missed or late payments.
    • Follow-Up Options: Some invoicing solutions offer follow-up options, allowing you to send reminders at customizable intervals based on your preferences.
  3. Expense Tracking
    • Categorization: Many photography invoicing software solutions include expense tracking features that allow you to categorize expenses related to different projects or clients. This functionality provides valuable insights into your business’s financial health.
    • Receipt Management: The ability to upload and store receipts within the software simplifies expense tracking and ensures you have documentation readily available for tax purposes.
  4. Payment Processing
    • Multiple Payment Options: Look for invoicing software that supports various payment methods, including credit cards, bank transfers, and digital wallets. Offering multiple payment options enhances convenience for clients.
    • Secure Transactions: Ensure that the software provides secure payment processing to protect client financial information and your business’s reputation.
  5. Client Portal
    • Client Access: A client portal allows clients to view their invoices, make payments, and access their billing history. This transparency enhances client satisfaction and fosters trust.
    • Document Sharing: Use the client portal to share important documents, contracts, and agreements related to the project. This feature keeps all relevant information centralized and accessible.
  6. Reporting and Analytics
    • Financial Insights: Many invoicing solutions include reporting features that provide insights into your business’s financial performance. Generate reports on sales, expenses, and payment history to make informed decisions.
    • Customizable Reports: The ability to customize reports based on specific criteria allows you to focus on the metrics that matter most to your business.
  7. Integration Capabilities
    • Third-Party Integrations: Ensure that the invoicing software can integrate seamlessly with other tools you use, such as accounting software, project management systems, and CRM platforms. This integration reduces the need for manual data entry and enhances overall efficiency.

Top Photography Invoicing Software Solutions

Here are some of the best photography invoicing software solutions available in 2024:

AC
Photography Invoicing Software: Billing Made Easy for Photographers 13

1. Xora

Xora is a comprehensive business management platform tailored for photographers, offering a suite of features to streamline operations and enhance client interactions.

Key Features:

  • Customizable Invoices: Create professional invoices that reflect your brand by adding logos and personalized elements.
  • Automated Payment Reminders: Set up automatic reminders to prompt clients about upcoming or overdue payments, reducing manual follow-ups.
  • Expense Tracking: Monitor and manage expenses efficiently, ensuring accurate financial records.
  • Integration with Payment Processors: Connect with various payment platforms to facilitate seamless payment collection from clients.
  • Client Relationship Management (CRM): Maintain detailed records of client interactions, helping build stronger relationships and enhance customer satisfaction.
  • Project and Task Management: Organize and track projects and tasks to ensure timely completion and efficient workflow.

Why It’s Great:

Xora combines robust invoicing capabilities with comprehensive business management tools, providing photographers with an all-in-one solution to manage their operations efficiently. Its user-friendly interface and tailored features make it an excellent choice for photographers seeking to streamline their business processes.

2. QuickBooks Online

Overview: QuickBooks Online is a popular accounting solution that includes comprehensive invoicing features suitable for photographers.

Key Features:

  • Customizable invoices with the option to add logos and branding.
  • Automated payment reminders and follow-up notifications.
  • Expense tracking with receipt capture capabilities.
  • Integration with various payment processors for easy payment collection.

Why It’s Great: QuickBooks Online offers robust accounting capabilities alongside invoicing, making it a one-stop solution for photographers managing their finances.

3. HoneyBook

Overview: HoneyBook is an all-in-one business management platform designed for creative professionals, including photographers. Its invoicing features help streamline the billing process.

Key Features:

  • Customizable invoices and contracts tailored to each project.
  • Automated payment processing options for seamless transactions.
  • Client portal for easy communication and document sharing.
  • Built-in scheduling and task management tools.

Why It’s Great: HoneyBook combines invoicing with project management features, making it ideal for photographers who want an all-in-one solution for their business operations.

4. Wave

Overview: Wave is a free accounting and invoicing software that is perfect for freelancers and small businesses, including photographers.

Key Features:

  • Customizable invoice templates with no hidden fees.
  • Automated payment reminders to reduce overdue payments.
  • Expense tracking and reporting features for financial insights.
  • Client portal for secure document sharing and payments.

Why It’s Great: Wave offers powerful features at no cost, making it an excellent choice for photographers just starting their business.

5. Invoice2go

Overview: Invoice2go is a simple invoicing solution that allows photographers to create professional invoices quickly and easily.

Key Features:

  • Easy-to-use interface for creating and sending invoices.
  • Customizable templates to match your branding.
  • Payment tracking and reporting capabilities.
  • Mobile app for invoicing on the go.

Why It’s Great: Invoice2go is perfect for photographers who need a straightforward and efficient invoicing solution without the complexity of full accounting software.

6. Zoho Invoice

Overview: Zoho Invoice is part of the Zoho suite of business tools and offers comprehensive invoicing capabilities for photographers.

Key Features:

  • Customizable invoices with branding options and itemized billing.
  • Automated payment reminders and follow-up emails.
  • Expense tracking and reporting features.
  • Client portal for easy access to invoices and payments.

Why It’s Great: Zoho Invoice integrates seamlessly with other Zoho applications, making it a versatile solution for photographers who use multiple business tools.

Best Practices for Using Photography Invoicing Software

To maximize the benefits of photography invoicing software, consider the following best practices:

  1. Keep Your Invoices Consistent
    • Standardized Branding: Develop a set of branding guidelines for your invoices that includes your logo, color scheme, and fonts. Using consistent branding across all invoices not only creates a professional image but also helps reinforce your brand identity. Clients are more likely to remember and recognize your brand when they see uniformity in your communications.
    • Template Utilization: Use the customizable templates provided by your invoicing software to maintain a uniform layout. This consistency ensures that your clients know what to expect, making it easier for them to navigate the invoices and locate important details.
  2. Automate Where Possible
    • Recurring Invoices: If you have clients with ongoing projects or retainer agreements, take advantage of the recurring invoice feature. Automating this process saves time and ensures that you don’t miss sending out invoices on schedule, which is crucial for maintaining a steady cash flow.
    • Payment Reminders: Set up automated payment reminders to notify clients about upcoming or overdue payments. This feature reduces the manual effort required to follow up with clients and helps ensure timely payments, ultimately improving your cash flow.
  3. Review Invoices Before Sending
    • Thorough Checks for Accuracy: Take the time to double-check all invoices for accuracy before sending them to clients. This includes verifying the billing amounts, itemized services, and client details. Errors in invoicing can lead to payment delays, misunderstandings, and can damage your professional reputation.
    • Utilize Preview Features: Many invoicing software solutions offer a preview feature that allows you to view the invoice as the client would see it. Use this feature to catch any errors before the invoice is sent.
  4. Communicate Clearly with Clients
    • Transparent Communication: Use the client portal effectively to communicate with clients regarding their invoices, payment options, and due dates. Being proactive in communication helps avoid confusion and builds strong client relationships. Make sure your clients know how to access the portal and use its features.
    • Clarify Payment Terms: Clearly outline payment terms on your invoices, including due dates and accepted payment methods. This clarity helps set client expectations and reduces the chances of late payments.
  5. Monitor Payment Status
    • Regular Tracking: Regularly check the status of outstanding invoices to stay on top of your accounts receivable. Most invoicing software provides dashboards or reports that summarize your invoices and their payment status, making it easy to identify which clients need follow-up.
    • Follow-Up Procedures: Establish a follow-up procedure for overdue payments. Send polite reminders to clients who haven’t paid by the due date, and consider setting specific intervals for follow-ups (e.g., one week after the due date, then again after two weeks).
  6. Utilize Reporting Features
    • Analyze Invoicing Data: Make use of the reporting features in your invoicing software to analyze your invoicing data. Track metrics such as total revenue, outstanding invoices, and payment timelines. Understanding these trends can help you identify areas for improvement in your billing process.
    • Financial Health Assessments: Regularly reviewing your financial performance allows you to make informed business decisions. Use the insights gained from your invoicing reports to adjust your pricing strategies, streamline operations, or identify new opportunities for growth.
  7. Stay Updated with Software Features
    • Regular Updates: Keep your invoicing software updated to benefit from new features and improvements. Software developers often release updates that enhance functionality and security.
    • Training and Resources: Take advantage of any training resources offered by your software provider, including webinars, tutorials, or documentation. Staying informed about the latest features and best practices ensures you’re using the software to its full potential.

Conclusion

Investing in photography invoicing software is essential for photographers looking to streamline their billing processes and improve financial management. The software solutions highlighted in this article offer a range of features designed to simplify invoicing, track payments, and enhance the overall client experience.

By implementing the right invoicing software and following best practices, photographers can spend less time on administrative tasks and more time focusing on their creative work. Embracing technology not only improves operational efficiency but also fosters better client relationships, ultimately contributing to the success of your photography business.

Page 2 of 3

Powered by WordPress & Theme by Anders Norén