Streamline your business with our all-in-one management software. Access 100s of templates tailored for various businesses to get started quickly. Manage leads, proposals, contracts, e-signatures, invoices, projects, and more effortlessly. Try Xora for free!"

Xora

Author: Team Xora

case management software for lawyers

5 Powerful Legal Case Management Software Solutions to Transform Your Practice

In the competitive world of legal practice, is not just a luxury—it’s a necessity. This software plays a pivotal role in managing cases efficiently, streamlining operations, enhancing client communication, and improving overall firm productivity. By utilizing effective law firm case management software, legal professionals can better organize case files, track deadlines, and ensure that important client interactions are not overlooked. This comprehensive guide will delve into the essential features, benefits, and best practices associated with legal case management software, offering law firms the insights they need to optimize their operations and deliver exceptional service to clients.

What is Law Firm Case Management Software?

Law firm case management software is a specialized tool designed to help legal professionals manage their cases more effectively. It serves as a centralized platform where attorneys can store case information, track deadlines, manage documents, and communicate with clients. The primary goal of this software is to enhance the efficiency of legal practices by automating mundane tasks, reducing administrative burdens, and allowing attorneys to focus more on practicing law.

legal case management software
5 Powerful Legal Case Management Software Solutions to Transform Your Practice 1

Core Components of Case Management Software

Understanding the components of law firm case management software can help firms choose the right tool for their specific needs. Key features often include:

  1. Case Tracking: Allows attorneys to monitor the progress of each case, set deadlines, and manage appointments.
  2. Document Management: Facilitates the organization, storage, and retrieval of case-related documents, ensuring that important files are easily accessible.
  3. Time Tracking and Billing: Automates the tracking of billable hours and generates invoices, streamlining the billing process.
  4. Client Communication: Offers secure communication channels between clients and attorneys, enhancing transparency and trust.
  5. Reporting and Analytics: Provides insights into firm performance, enabling data-driven decisions and strategic planning.

Benefits of Law Firm Case Management Software

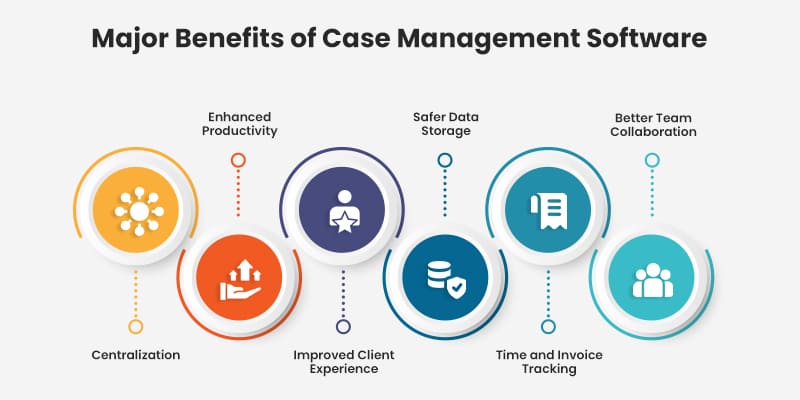
Implementing law firm case management software offers numerous advantages:

  1. Organized Case Management: With all case-related information stored in a centralized system, attorneys can easily access the information they need without sifting through physical files or scattered digital documents. This organization leads to improved time management and reduces the risk of missing deadlines.
  2. Improved Collaboration: Case management software often includes tools that allow team members to collaborate effectively. Shared calendars, task assignments, and document sharing foster a collaborative environment, ensuring that everyone involved in a case is on the same page.
  3. Increased Efficiency: By automating routine tasks such as document generation, time tracking, and billing, law firms can significantly enhance their operational efficiency. This efficiency leads to better time management, enabling attorneys to focus on legal work rather than administrative duties.
  4. Enhanced Client Communication: Client portals and communication tools included in case management software allow clients to access their case information, communicate with their attorneys, and receive updates in real-time. This level of transparency improves client satisfaction and strengthens the attorney-client relationship.
  5. Data Security: With sensitive client information involved, law firms must prioritize data security. Law firm case management software often includes robust security measures, such as encryption, secure access controls, and backup solutions, to protect confidential data and ensure compliance with legal standards.
  6. Comprehensive Reporting and Analytics: Many case management software solutions provide reporting features that allow firms to analyze their performance. By generating reports on case progress, billable hours, and revenue, attorneys can identify areas for improvement and make informed decisions about resource allocation.

Choosing the Right Case Management Software

When selecting legal case management software, law firms should consider several factors to ensure they choose a solution that meets their unique needs:

  1. Assess Your Firm’s Needs: Consider your firm’s size, practice area, and specific challenges. A small firm may require different features than a large firm specializing in multiple areas of law.
  2. Evaluate Features: Look for software that includes essential features such as case tracking, document management, billing, and client communication tools. Make a list of must-have features and compare different software options against this list.
  3. User-Friendliness: The software should be intuitive and easy to use. If the system is too complex, it may lead to frustration and hinder productivity. Request demos or trial periods to assess usability.
  4. Integration Capabilities: Ensure the software can integrate with other tools your firm uses, such as email, accounting software, or practice-specific applications. This integration can enhance overall efficiency and streamline workflows.
  5. Vendor Reputation: Research potential vendors by reading reviews and testimonials from other law firms. A reputable vendor should have a track record of providing reliable software and excellent customer support.
  6. Budget Considerations: Determine your budget for case management software and explore options that fit within this range. Consider the total cost of ownership, including licensing fees, implementation costs, and ongoing maintenance.

Conclusion

Investing in law firm case management software can transform how legal practices operate, leading to better organization, increased efficiency, and enhanced client satisfaction. By leveraging the right software, law firms can focus on what they do best—practising law—while leaving administrative tasks to technology.

Training and Support

Comprehensive training for all staff is crucial for maximizing the usage of any new software. When transitioning to a new system like Xora, effective training ensures that team members are well-equipped to utilize the software’s features and functionalities to their fullest potential. Here are several strategies to enhance training and support:

  1. Structured Onboarding Programs: Develop a structured onboarding program that includes a series of training sessions tailored to different roles within the organization. This program should cover essential features, best practices, and how the software fits into daily workflows.
  2. Workshops and Webinars: Consider hosting interactive workshops or webinars led by experts who can demonstrate the software’s capabilities. These sessions can include hands-on training and Q&A segments, allowing staff to ask questions and get real-time assistance.
  3. Training Resources: Provide access to training materials such as user manuals, video tutorials, and FAQs. These resources should be easily accessible to all employees for reference during their day-to-day operations.
  4. Ongoing Support: Establish a support system where employees can seek help when they encounter issues or have questions about the software. This could include a dedicated help desk, chat support, or regular office hours where team members can drop in for assistance.
  5. Encourage Peer Learning: Foster a culture of peer learning where experienced users can mentor others. This can enhance the learning experience and build confidence among team members as they adapt to the new system.

Customization

Customization of the software to fit your firm’s specific workflows and processes is essential for enhancing usability and ensuring that it aligns with the unique needs of your practice. Here are some key points to consider when customizing your CRM software:

  1. Tailored Dashboards: Create customized dashboards that display relevant metrics and information specific to different roles within your firm. For example, a project manager might need to see task statuses and deadlines, while an accountant may focus on financial reports.
  2. Workflow Automation: Identify repetitive tasks within your workflow and automate them using the software’s features. Custom workflows can streamline processes like invoicing, follow-ups, and project updates, saving time and reducing errors.
  3. Custom Fields: Utilize custom fields to capture specific information that is pertinent to your business. Whether it’s tracking client preferences or project details, customizing fields ensures you have all necessary data without cluttering your system with irrelevant information.
  4. Integration with Existing Tools: Customize your software to integrate seamlessly with other tools and platforms your firm uses, such as email systems, accounting software, or project management tools. This ensures a smooth flow of information across platforms and reduces the need for duplicate data entry.
  5. User Roles and Permissions: Define user roles and permissions based on the specific needs of your team. Customizing access levels can enhance security and ensure that team members only see the information relevant to their roles.

Data Migration

Planning for a structured data migration process is crucial when transitioning to new software. Transferring existing case files and client information into the new system requires careful consideration to maintain data integrity. Here are steps to ensure a smooth migration:

  1. Data Audit: Before migration, conduct a thorough audit of your existing data. Identify what information needs to be transferred, and determine if any data is outdated or unnecessary. Cleaning up your data before migration can streamline the process.
  2. Migration Strategy: Develop a clear migration strategy that outlines how the data will be transferred. This includes choosing the right migration tools, determining the timeline, and designating team members responsible for overseeing the process.
  3. Data Mapping: Create a data mapping plan to ensure that each piece of data from the old system corresponds correctly to the new system. This step is crucial to avoid errors during the migration.
  4. Testing the Migration: Before fully migrating all data, perform a test migration with a small subset of data. This allows you to identify any issues or discrepancies and make necessary adjustments before the complete migration.
  5. Post-Migration Validation: After the migration is complete, conduct a validation process to ensure that all data has been accurately transferred and is functioning correctly within the new system. This includes checking for data integrity and consistency.

Regular Updates and Maintenance

To maximize the performance of your software, it’s essential to stay up-to-date with regular updates and maintenance. Here are key points to consider:

  1. Software Updates: Regularly update the software to benefit from new features, enhancements, and security patches. Staying current ensures you are using the most efficient version of the software.
  2. Security Protocols: Implement robust security measures to protect sensitive client data. Regular updates often include security enhancements that address vulnerabilities, helping to safeguard your information.
  3. Performance Monitoring: Continuously monitor the software’s performance to identify any issues early. Look out for slow loading times, errors, or glitches, and address them promptly to maintain productivity.
  4. User Feedback: Encourage team members to provide feedback on the software’s performance. Regularly gathering input can help identify areas for improvement and ensure the system meets the evolving needs of your practice.
  5. Scheduled Maintenance: Plan for scheduled maintenance windows where updates and performance optimizations can be implemented without disrupting daily operations. Inform team members in advance to minimize interruptions.

Feedback and Iteration

Encouraging staff to provide feedback on the software’s performance and usability is vital for continuous improvement. Here’s how to foster a feedback culture:

  1. Regular Check-Ins: Schedule regular check-in meetings to discuss how the software is working for team members. Use these sessions to gather feedback and share insights on best practices.
  2. Anonymous Surveys: Consider using anonymous surveys to collect honest feedback about the software’s usability and features. This can encourage more candid responses and help identify pain points.
  3. Iterative Improvements: Use the feedback collected to make continuous improvements and adjustments to your processes. Iteration is key to ensuring the software aligns with the changing needs of your business.
  4. Training Adjustments: Based on feedback, refine your training programs to address areas where team members may struggle. Providing targeted training can enhance confidence and effectiveness in using the software.
  5. Celebrate Successes: Acknowledge and celebrate improvements made based on staff feedback. Recognizing contributions boosts morale and encourages ongoing participation in the feedback process.

To complement the pillar page, the following topic cluster articles provide deeper insights into specific aspects of law firm case management software:

1. How Law Firm Case Management Software Helps Improve Client Relationships

Introduction: In the legal profession, strong client relationships are paramount. Satisfied clients are more likely to return for future legal needs and refer others. This article will explore how law firm case management software enhances client relationships by facilitating communication and providing a seamless experience.

Key Points:

  • Transparent Communication: Case management software often includes client portals that allow clients to view their case status and access important documents. This transparency builds trust and ensures clients feel informed throughout the process.
  • Timely Updates: Automated notifications and reminders help attorneys keep clients updated on important milestones and deadlines. This proactive communication can alleviate client anxiety and enhance satisfaction.
  • Personalized Service: With access to comprehensive client history and case details, attorneys can provide tailored advice and support. This personalization helps clients feel valued and understood.
  • Feedback Mechanisms: Some case management software includes tools for soliciting client feedback, enabling firms to gather insights on their services and make improvements where necessary.

Conclusion: Utilizing case management software can significantly improve client relationships, leading to higher satisfaction rates and increased referrals.

2. The Ultimate Guide to Choosing the Right Case Management Software for Your Law Firm

Introduction: Selecting the right case management software is a critical decision for any law firm. This article serves as a comprehensive guide to help legal professionals navigate the selection process.

Key Points:

  • Assess Your Firm’s Needs: Begin by identifying the specific challenges your firm faces and the features that will best address those challenges. For instance, a personal injury firm may prioritize case tracking and billing features, while a family law practice may focus on document management and client communication.
  • Feature Comparison: Create a comparison chart outlining the features of different software options. Look for capabilities such as:
    • Case Management: Track deadlines, appointments, and case notes.
    • Document Management: Store, organize, and retrieve case documents.
    • Billing and Invoicing: Automate time tracking and invoicing processes.
    • Client Communication: Facilitate secure communication channels with clients.
    • Reporting and Analytics: Generate reports on performance and billing.
  • Vendor Research: Investigate potential vendors by reading reviews, asking for referrals, and attending webinars or demos. Understanding other users’ experiences can provide valuable insights.
  • Trial Periods: Take advantage of free trials or demos offered by vendors. This hands-on experience allows your team to assess the software’s usability and features before committing.

Conclusion: Choosing the right case management software requires careful consideration and research. By following this guide, law firms can make informed decisions that align with their needs and objectives.

Introduction: Successfully implementing case management software involves more than just purchasing a solution; it requires strategic planning and execution. This article outlines best practices for ensuring a smooth implementation process.

Key Points:

  • Training and Support: Comprehensive training for all staff is crucial for maximizing software usage. Consider hosting workshops or webinars to familiarize employees with the software’s features and functionalities.
  • Customization: Customize the software to fit your firm’s specific workflows and processes. Tailoring the system can enhance usability and ensure that it aligns with the unique needs of your practice.
  • Data Migration: Plan for a structured data migration process to transfer existing case files and client information into the new software. Ensure that data integrity is maintained throughout the migration.
  • Regular Updates and Maintenance: Stay up-to-date with software updates and security patches. Regular maintenance can prevent technical issues and enhance the software’s performance.
  • Feedback and Iteration: Encourage staff to provide feedback on the software’s performance and usability. Use this feedback to make continuous improvements and adjustments.

Conclusion: By following best practices for implementation, law firms can enhance the effectiveness of their case management software and ultimately improve their operations.

4. Common Challenges Law Firms Face When Using Case Management Software

Introduction: While case management software offers numerous benefits, law firms may encounter challenges during implementation and usage. This article addresses common issues and provides solutions to overcome them.

Best Law Firm Software Solutions for Modern Legal Practices
5 Powerful Legal Case Management Software Solutions to Transform Your Practice 2

5 Powerful Tips for Stunning Drone Photography: Transform Your Shots into Masterpieces!

drone photography
5 Powerful Tips for Stunning Drone Photography: Transform Your Shots into Masterpieces! 3

Introduction to Drone Photography

Drone photography has revolutionized the world of photography, allowing photographers to capture breathtaking aerial shots that were previously impossible or expensive to achieve. Whether you are a professional photographer or an enthusiastic hobbyist, mastering the art of drone photography can elevate your work to new heights. This article provides five powerful tips that will help you transform your drone photography shots into masterpieces. We will cover essential aspects such as pre-flight planning, weather conditions, camera settings, battery management, and staying compliant with regulations. Let’s jump in!

India is home to many iconic landmarks and natural wonders. Here are a few must-visit locations for breathtaking drone shots:

  • Taj Mahal, Agra: Capture the beauty of this iconic monument from a unique aerial perspective. Be sure to check for specific permissions and restrictions.
  • Backwaters, Kerala: The serene backwaters offer stunning reflections and lush greenery, perfect for tranquil drone photography.
  • Rann of Kutch, Gujarat: The vast white salt desert creates a dramatic and unique landscape for aerial shots.
  • Himalayas, Himachal Pradesh and Uttarakhand: The majestic mountains provide a breathtaking backdrop for adventurous drone photography.

1. Pre-Flight Planning

Choosing the Right Location

One of the first steps in pre-flight planning is selecting the perfect location for your shoot. Look for areas with interesting landscapes, patterns, and structures that stand out from above. Websites like Google Maps can be incredibly helpful for scouting locations. Always get permission if you are planning to fly in restricted areas.

Understanding the Flight Path

Before taking off, outline a clear flight path. This includes understanding the altitude you plan to fly at and identifying any potential obstacles. Make sure you never fly in the flight path of other air vehicles.

2. Weather Conditions

Check the Forecast

Weather can make or break your drone photography session. Always check the weather forecast before you head out. Ideal conditions include clear skies and minimal wind. Windy conditions can make it difficult to maneuver your drone and can result in shaky footage.

Lighting and Time of Day

Lighting plays a critical role in photography, and drone shots are no exception. The golden hours—shortly after sunrise and before sunset—offer the best lighting conditions. Soft light during these times can add depth and warmth to your images.

3. Camera Settings

Manual Settings

Auto settings can be convenient, but for the best quality, switch to manual mode. Adjust ISO, shutter speed, and aperture to get the perfect shot. For example, lower ISO settings can reduce noise, while a faster shutter speed is excellent for capturing fast-moving subjects.

Shooting in RAW

Always shoot in RAW format. RAW files retain all the data captured by the camera sensor, giving you more flexibility in post-processing. This can make a significant difference, especially when it comes to color grading and exposure adjustments.

This article outlines some great camera settings for drone photography.

4. Battery Management

Pre-Flight Battery Check

Your drone’s battery life is crucial for a successful shoot. Always check the battery status before you take off. Ensure that it is fully charged and in good health. Investing in extra batteries is always a good idea for extended shoots.

Efficient Usage

During your flight, monitor your battery usage and return home well before the battery is depleted. Many drones, like those supported by Xora, come with battery management systems that can automatically bring your drone back when battery levels drop to a critical point.

5. Regulations

Understanding Local Laws

Staying compliant with local regulations is vital for both safety and legality. Different countries and even regions within countries have varying rules for drone usage. Research and understand these regulations thoroughly before you fly.

Register Your Drone

In many jurisdictions, drones over a certain weight must be registered with the appropriate authorities. Make sure your drone is registered if required and that you carry proof of registration during your flights.

Before you fly your drone in India, familiarize yourself with the local regulations. The Directorate General of Civil Aviation (DGCA) has specific rules for drone operations, including registration requirements, no-fly zones, and altitude limits. Make sure you:

  • Register Your Drone: All drones need to be registered with the DGCA.
  • Obtain Necessary Permissions: Depending on your location and the purpose of your flight, you might need additional permissions.
  • Check No-Fly Zones: Avoid restricted areas, such as near airports, military bases, and certain government buildings.

For detailed information, visit the DGCA website.

Relevant Statistics and Data

Did you know that according to the FAA, the drone industry is expected to grow to $63.6 billion by 2025? With more drones in the sky, mastering drone photography has never been more relevant. Additionally, research by Statista shows that images and videos with aerial perspectives receive 45% more engagement on social media compared to traditional photography.

Conclusion

Drone photography is a rapidly evolving field that offers limitless creative opportunities. By following these five powerful tips—pre-flight planning, checking weather conditions, optimizing camera settings, managing battery life, and staying compliant with regulations—you can significantly improve your drone photography skills and transform your shots into masterpieces.

Drone photography in India opens up a world of creative possibilities, allowing you to capture the country’s beauty from new heights. By understanding local regulations, planning your shots, and optimizing your settings, you can create stunning aerial images that showcase the diverse landscapes of India. Always prioritize safety and respect local culture to ensure a positive and enriching drone photography experience.

Ready to elevate your photography? Xora allows you to focus on your creative self, and helps you manage your business on automation. Try Xora with a free trial and a money-back guarantee today!

For more tips and in-depth guides, check out our other articles on photography here. Have a question or a tip to share? Leave a comment below!

5 Tips for Amazing Maternity Photography: Transform Your Photos with These Powerful Secrets

Maternity photography
5 Tips for Amazing Maternity Photography: Transform Your Photos with These Powerful Secrets 4

Introduction to Maternity Photography

Maternity photography is a beautiful way to capture the magic of pregnancy and the anticipation of a new life. However, it requires a certain level of expertise and creativity to truly capture the essence of this special time. Whether you’re a seasoned professional or an aspiring photographer, mastering the art of maternity photography can set your work apart. In this article, we reveal 5 powerful tips that will transform your maternity photos. From harnessing natural light to mastering the perfect pose, we cover everything you need to know.

1. Harness the Power of Natural Light

Why Natural Light is Essential

Natural light can add a soft, ethereal quality to your maternity photos, highlighting the beauty and glow of pregnancy. It creates a more genuine and emotional atmosphere that is hard to replicate with artificial lighting.

Best Times for Natural Light

The best times of the day for natural lighting are during the golden hours—shortly after sunrise and before sunset. The sunlight during these times is softer and warmer, adding a flattering glow to your subject.

Tips for Utilizing Natural Light

  • Position your subject so that the light falls gently on their face and body.
  • Use reflectors to bounce light onto darker areas.
  • Avoid harsh midday sun as it can create unflattering shadows.

2. Perfect the Art of Posing

Creating Comfortable and Natural Poses

Maternity photos should exude comfort, confidence, and motherly love. Posing can make or break a photo, so it’s crucial to guide your subject into positions that showcase these emotions.

Classic Poses for Maternity Photography

  • Hands on Belly: This classic pose accentuates the baby bump and creates a connection between the mother and the unborn child.
  • Side Profiles: A side profile can beautifully highlight the shape of the baby bump.
  • Sitting Down: Sitting adds a relaxed vibe and can offer various pose options, like resting hands on the bump or looking down lovingly.
  • Partner Interaction: Including the partner in the photo can add an emotional and intimate touch.

Here is a guide to some of the best poses for maternity photography.

3. Use Props Wisely

The Importance of Props

Props can add elements of personality and storytelling to maternity photos. However, it’s essential to use them wisely to ensure they complement rather than overshadow the subject.

  • Ultrasound images
  • Baby shoes
  • Letters and signs
  • Floral crowns or greenery

Integrating Props Seamlessly

Ensure that your props are relevant and meaningful. They should add to the narrative of the photo session and enhance the emotional depth. Keep the props simple and avoid cluttering the frame.

4. Choose the Perfect Location

Scouting the Right Location

The location you choose can set the tone for your maternity photo shoot. Whether it’s a serene park or an intimate home setting, make sure it reflects the personality and story of the expectant mother.

  • Natural Settings: Parks, gardens, beaches
  • Urban Settings: Cityscapes, cobblestone streets
  • Indoor Settings: Home, cozy studios

Factors to Consider When Choosing a Location

  • Weather and season
  • Privacy and comfort level
  • Lighting conditions
  • Accessibility and convenience

5. Perfect Timing: Capture the Best Moments

When to Schedule a Maternity Photo Shoot

The ideal time to schedule a maternity photo shoot is around the 28-32 week mark. During this period, the baby bump is prominent yet the mother is usually still comfortable enough to move around and pose.

Optimal Session Length

Maternity sessions usually last between 1-2 hours. This allows enough time for outfit changes, different poses, and location shifts without exhausting the mother-to-be.

Tips for Perfect Timing During the Session

  • Be ready to capture spontaneous moments and emotions.
  • Encourage the mother to take breaks as needed.
  • Be mindful of her comfort and well-being throughout the session.

Additional Tips for Stunning Maternity Photography

While the above tips are crucial, there are additional considerations that can elevate your maternity photography:

Wardrobe Choices

Advise your client to choose outfits that are comfortable and highlight the baby bump. Flowing dresses, fitted tops, and wraps are excellent choices.

Editing and Post-Processing

Edit your photos to enhance natural beauty. Adjust lighting, color balance, and remove any minor blemishes. Software like Adobe Lightroom and Photoshop can be invaluable tools.

Conclusion

Maternity photography is a unique and rewarding field that allows you to capture a fleeting yet beautiful moment in a soon-to-be mother’s life. By harnessing the power of natural light, perfecting poses, wisely using props, selecting the right location, and timing your shoot perfectly, you can create stunning and memorable images.

Ready to take your maternity photography to the next level? Try Xora, a leading software designed to streamline your workflow and enhance your photos. Sign up now for a free trial with a money-back guarantee. Experience the difference today!

For more on photography tips, check out our other articles on our blog.


“`

5 Tips for Beautiful Family Portraits: Transform Your Photos With These Pro Secrets!

Beautiful family portrait
5 Tips for Beautiful Family Portraits: Transform Your Photos With These Pro Secrets! 5

Introduction to Beautiful Family Portraits

Are you tired of struggling to capture the perfect beautiful family portrait? Whether you’re a professional photographer or an avid enthusiast, achieving beautiful family portraits can be a daunting task. But worry no more! In this comprehensive guide, we will share five expert tips that will elevate your family portrait sessions and transform your photos. From natural poses to the best times for outdoor shots, we’ve got you covered. These pro secrets are designed to help ICP Photographers like yourself create stunning, beautiful family portraits. Read on to discover how you can take your family photography skills to the next level!

1. Mastering Natural Poses

Understanding the Importance of Natural Poses

One of the most critical elements of a captivating beautiful family portrait is achieving natural poses. Forced or stiff poses can make your subjects look uncomfortable, which is the last thing you want in a family photo. Instead, aim for relaxed and natural positions that allow each family member’s personality to shine through.

How to Encourage Natural Posing

Encouraging natural poses starts with making your subjects feel at ease. Share a joke, engage in casual conversation, or ask them to move around a bit. Quick activities like walking hand-in-hand or playing with the family dog can lead to spontaneous and candid shots. Remember, the more comfortable your subjects are, the more natural their poses will be.

Utilizing Positioning Techniques

Positioning family members in a slightly staggered arrangement can add depth and interest to your photos. For instance, have the parents sit while the children stand behind or beside them. This setup breaks the monotony of flat, linear arrangements and makes the portrait more dynamic.

2. Fostering Genuine Interaction

The Significance of Interaction in Beautiful Family Portraits

Interaction between family members can breathe life into your portraits. Genuine interactions result in natural expressions and joyous moments that your clients will treasure.

Techniques to Capture Authentic Interactions

Prompt your subjects with questions or activities that encourage interaction. Ask the parents to share a fun family memory or have the children play a game together. The key is to create situations where family members are focusing on each other rather than the camera. This approach helps in capturing spontaneous and heartfelt moments that truly reflect the family’s bond.

3. Enhancing Your Photos with Props

The Role of Props in Beautiful Family Portraits

Props can add a creative flair to your family portraits and help convey the family’s story or interests. They can also make your subjects, especially children, feel more comfortable and engaged during the session.

Choosing the Right Props

When selecting props, consider items that are meaningful to the family or that match the theme of the shoot. For example, a family who loves reading might incorporate their favorite books, while a family with young children might use toys or blankets. Avoid overwhelming the scene with too many props; the focus should remain on the family.

Incorporating Props Seamlessly

Arrange props in a way that they naturally fit into the scene. For instance, if you’re shooting in a park, you might include a picnic blanket for the family to sit on or a basket of flowers for the children to hold. The goal is to enhance the photo without detracting from the family as the main subject.

4. Choosing the Perfect Location

The Impact of Location on Beautiful Family Portraits

The location of your photoshoot plays a significant role in setting the tone and mood of your beautiful family portraits. A well-chosen location can complement the family’s style and personality and provide a beautiful backdrop for your images.

Consider locations that offer a variety of backgrounds and natural lighting. Parks, beaches, and gardens are popular choices due to their scenic beauty and versatility. For a more personal touch, you might choose the family’s home or a place that holds special meaning to them.

Scouting and Preparing the Location

Before the shoot, visit the chosen location to scout out the best spots and assess the lighting conditions. Take note of any potential distractions or elements that could interfere with the photos. On the day of the shoot, arrive early to set up and ensure everything is in place.

This article talks about more ideas on selecting beautiful locations for family portraits.

5. Perfecting the Timing and Lighting

The Benefits of Scheduling Your Shoot at the Right Time

Timing is crucial for achieving optimal lighting and ensuring a smooth photoshoot. The “golden hour”—the hour after sunrise and the hour before sunset—is ideal for capturing warm, soft light that is flattering for portraits.

Working with Natural Light

Natural light can create stunning effects in your photos, but it’s essential to know how to work with it. Avoid harsh midday sun, which can create unflattering shadows and make your subjects squint. Instead, opt for diffused light, such as on a cloudy day or in shaded areas.

Utilizing Additional Lighting Tools

If natural light is insufficient, consider using reflectors or external flashes to enhance the illumination. Reflectors can help bounce light onto your subjects, reducing shadows and adding a soft glow. External flashes can provide the necessary fill light, especially in low-light conditions.

Relevant Statistics and Data

To support the importance of these tips, consider these statistics:

– According to a study by PPA (Professional Photographers of America), 78% of family portrait clients prefer natural and candid photos over posed images.
– A survey by CreativeLive found that 85% of families chose their photoshoot location based on personal significance, highlighting the importance of meaningful settings.

These insights underscore the value of natural poses, genuine interactions, and thoughtful locations in creating beautiful family portraits.

Images and Infographics Suggestions

To enhance user engagement, consider adding the following visual elements:

– High-quality images showing examples of natural poses and interactions.
– Infographics illustrating the best times for outdoor shoots during the day.
– Example photos displaying creative use of props and various location settings.

These visuals can help readers better understand and apply the tips provided in the article.

Conclusion

Creating beautiful family portraits requires a combination of technical skill, creativity, and an understanding of human connections. By mastering natural poses, fostering genuine interactions, incorporating thoughtful props, selecting ideal locations, and perfecting timing and lighting, you can elevate your family photography sessions to new heights. We hope these expert tips help you capture stunning, memorable photos that your clients will cherish for years to come.

Remember, as part of our commitment to helping you succeed, we offer a free trial with a money-back guarantee for Xora. Try Xora today and experience the difference it can make in your photography journey!

For more photography tips and resources, check out our other articles on our blog.

4 Creative Lighting Techniques to Transform Your Photos into Stunning Masterpieces!

Creative Lighting Techniques for Photographers
4 Creative Lighting Techniques to Transform Your Photos into Stunning Masterpieces! 6

Introduction to Creative Lighting Techniques

Creative lighting techniques are an essential element of photography, capable of transforming ordinary shots into extraordinary masterpieces. Whether you’re an amateur or a seasoned photographer, understanding and effectively utilizing various lighting techniques is essential for capturing breathtaking images. In this article, we’ll discuss four creative lighting techniques—Backlighting, Low-Key Lighting, High-Key Lighting, and Light Painting—that can elevate your photography skills to a professional level.

1. Backlighting

Backlighting is a technique where the light source is placed behind the subject, illuminating it from the back. This setup can create dramatic effects, adding depth and dimension to your photos.

Why Use Backlighting for Creative Lighting Techniques?

Backlighting creates a stunning halo effect around the subject, making it stand out against the background. It is particularly effective for silhouette photography, where the subject becomes a dark shape against a brightly lit background. This technique can also add a magical, ethereal quality to your images.

How to Achieve Perfect Backlighting

To achieve the best results with backlighting:
– Position the light source behind your subject, preferably at a low angle.
– Use a diffuser to soften the light and reduce harsh shadows.
– Adjust your camera settings to expose for the background, allowing the subject to appear as a silhouette if desired.

Pro Tip: Experiment with different times of the day, especially during the golden hour (the hour after sunrise and the hour before sunset), to capture the most flattering light.

2. Low-Key Lighting

Low-key lighting emphasizes shadows and highlights to create moody, dramatic images. This technique utilizes a single light source to produce high contrast and deep shadows.

Characteristics of Low-Key Lighting

Low-key lighting is characterized by its dark tones and strong shadows. It is an excellent technique for portrait photography, as it can add emotional depth and highlight the subject’s features.

Tips for Capturing Low-Key Images

To capture stunning low-key photos:
– Use a single light source, such as a softbox or an off-camera flash, positioned to the side of the subject.
– Keep the background dark to focus attention on the subject.
– Use a low ISO setting and a wide aperture to enhance the shadows’ richness.

Pro Tip: Enhance the mood by using dark clothing and backgrounds, which can further accentuate the dramatic effect.

3. High-Key Lighting

In contrast to low-key lighting, high-key lighting involves bright, even illumination that minimizes shadows. This technique is perfect for creating cheerful, uplifting images.

Benefits of High-Key Lighting

High-key lighting is ideal for fashion, product, and portrait photography. It produces clean, crisp images with a bright and airy feel, making it suitable for creating a positive and happy atmosphere.

How to Create High-Key Photos

To achieve high-key lighting:
– Use multiple light sources to evenly illuminate the subject and background.
– Set your camera to a high ISO and a narrow aperture to maintain brightness throughout the image.
– Use white or light-colored backgrounds to reflect light and reduce shadows.

Pro Tip: High-key lighting works exceptionally well with light-colored subjects and clothing, enhancing the overall brightness and positivity in the image.

4. Light Painting

Light painting is a creative technique that involves using a moving light source during a long exposure to create stunning patterns and effects.

The Magic of Light Painting

Light painting allows for endless creativity, as you can “paint” with light to create various shapes, patterns, and designs. This technique is perfect for nighttime or low-light photography and can produce surreal and abstract images.

Steps to Master Light Painting

To master light painting:
– Use a tripod to keep your camera steady during long exposures.
– Set your camera to a long exposure (shutter speed of 10 seconds or more) and a low ISO to capture the light trails.
– Use a flashlight, LED light, or any other portable light source to “paint” in front of the camera.

Pro Tip: Experiment with different light sources and colors to create unique and captivating effects. You can even use sparklers or glow sticks for added creativity.

Additional Tips for Creative Lighting in Photography

While the techniques mentioned above are transformative, here are a few more tips to elevate your photography:
– Understand the direction of light and how it affects shadows and highlights.
– Use natural light to your advantage, especially during early morning and late afternoon.
– Experiment with light modifiers such as reflectors, diffusers, and grids to control light.

photo studio booking software
4 Creative Lighting Techniques to Transform Your Photos into Stunning Masterpieces! 7

Conclusion

Mastering creative lighting techniques like Backlighting, Low-Key Lighting, High-Key Lighting, and Light Painting can significantly enhance your photography skills and result in stunning masterpieces. Whether you’re capturing a dramatic portrait, a cheerful scene, or a surreal light painting, these techniques offer endless possibilities for artistic expression.

Looking to improve your photography further? Read our photography tips blog for more ideas and tips to take your photography to the next level. You can also find other helpful business management tips that will make you succeed in your photography venture on our Xora blog. Sign up for a free trial with a money-back guarantee and see the difference Xora can make in your photography journey.

For more tips and techniques, check out our other articles on creative lighting techniques here.

Remember, the key to stunning photography lies in your creativity and experimentation. Happy shooting!

5 Game-Changing Tips for Better Pet Photography: Unleash Your Furry Friend’s Inner Superstar

Pet Photography Tips
5 Game-Changing Tips for Better Pet Photography: Unleash Your Furry Friend's Inner Superstar 8

Introduction to Pet Photography in India

Pet photography is an art that requires a unique blend of patience, creativity, and technical skill. Capturing the essence and personality of your furry friend can be both challenging and rewarding. Whether you’re a professional ICP photographer or an amateur looking to improve, these five game-changing tips will help you take your pet photography to the next level. In this article, we will cover essential strategies such as using natural light, incorporating treats and toys, and mastering the right angles and settings, ensuring that your pet photos turn out sensational every time.

1. Patience: The Key to Captivating Pet Photography Portraits

Patience is more than just a virtue in pet photography; it’s an absolute necessity. Pets are often playful, curious, and sometimes unpredictable. Trying to rush a session or force a pose can lead to frustration for both you and your pet.

Understanding Your Pet’s Temperament

Every pet has a unique temperament. Some may be naturally more photogenic and willing to cooperate, while others may need more time to warm up. Spend some time observing and understanding your pet’s behavior before diving into a photo session. This will help you anticipate their actions and capture more candid shots.

Taking Breaks

Long sessions can be tiring for pets, leading them to become restless or uncooperative. Schedule short, frequent breaks to keep them relaxed and happy. During these breaks, you can review the photos you’ve taken and plan the remaining shots.

2. Natural Light: Your Best Friend in Pet Photography

Lighting is one of the most critical aspects of photography. When it comes to pet photography, natural light is your best friend. It provides a soft and flattering illumination that can highlight your pet’s features beautifully.

Golden Hour Magic

The golden hour, which occurs shortly after sunrise and before sunset, offers the most beautiful natural light. During this time, the light is soft, diffused, and warm, making it perfect for outdoor pet photography sessions. Experiment with different angles to see how the light interacts with your pet’s fur and eyes.

Indoor Lighting Tips

When shooting indoors, position your pet near a large window that allows ample natural light. Avoid using flash as it can startle your pet and create harsh shadows. Instead, rely on the natural light streaming in from the windows or consider using a reflector to bounce light onto your subject.

3. Treats and Toys: Keeping Your Pet Engaged and Happy

One of the most effective ways to keep your pet engaged during a photo session is by using treats and toys. These can serve as both rewards and props, making your pet more willing to participate and stay relaxed.

Using Treats

Keep a stash of your pet’s favorite treats handy. Use them to reward good behavior and cooperation. Treats can also be used to direct your pet’s gaze, helping you capture the perfect shot.

Incorporating Toys

Toys can be used to bring out your pet’s playful side. Capture action shots by tossing a toy or encouraging your pet to play. This can lead to dynamic and lively photos that showcase your pet’s personality.

4. Low Angles: Getting Down to Your Pet’s Level

Shooting from a low angle, at your pet’s eye level, can create more intimate and engaging photos. This perspective helps you capture the world from your pet’s point of view, resulting in more relatable and powerful images.

Crouch or Lie Down

Don’t be afraid to get down on the ground. Crouch or lie down to achieve the perfect low-angle shot. This technique can be especially effective when photographing small pets like cats or small dogs.

Experiment with Perspectives

While low angles are great, don’t limit yourself. Experiment with different perspectives and angles to find the most flattering and interesting compositions.

5. Fast Shutter Speed: Capturing the Perfect Moment

Pets are often in constant motion, which can make capturing sharp images challenging. Using a fast shutter speed is essential to freezing those perfect moments of action.

Setting the Right Shutter Speed

For active pets, set your camera to a shutter speed of at least 1/1000th of a second. This will help you capture sharp images without motion blur. If your pet is relatively still, you can use a slower shutter speed, but be prepared to adjust quickly.

Continuous Shooting Mode

Utilize your camera’s continuous shooting mode to take multiple shots in quick succession. This increases the likelihood of capturing the perfect moment, whether it’s a mid-air jump or a playful chase.

Learn more about how to master shutter speed for fast moving pets here.

Additional Tips for Stellar Pet Photography

While the five tips above are essential, there are a few more techniques that can help you elevate your pet photography game.

Background and Composition

Choose a background that complements your pet and isn’t too distracting. Simple, natural settings like a park or a plain wall work well. Pay attention to composition rules like the rule of thirds to create balanced and aesthetically pleasing images.

Editing for Perfection

Post-processing can enhance your photos significantly. Use editing software like Adobe Lightroom to adjust exposure, contrast, and colors. However, be mindful not to over-edit. Aim to enhance the natural beauty of your pet without making the photo look overly processed.

Conclusion

Mastering pet photography takes time, patience, and practice, but the results are incredibly rewarding. By following these five game-changing tips—practicing patience, utilizing natural light, engaging your pet with treats and toys, experimenting with low angles, and using a fast shutter speed—you’ll be well on your way to capturing stunning images that showcase your furry friend’s inner superstar.

Xora allows you to focus on the things you love to do, such as focus on pet photography. Let Xora manage all other aspects of your business so that you can focus on doing what you love. Start a no questions asked, money back guarantee trial today.

For more photography tips and tutorials, explore our blog and don’t forget to view our other tutorials for more ways to enhance your skills and creativity.

5 Advanced Editing Techniques to Transform Your Content: Unlock Jaw-Dropping Results Today!

Advanced editing techniques photographers
5 Advanced Editing Techniques to Transform Your Content: Unlock Jaw-Dropping Results Today! 9

Introduction to Advanced Editing Techniques

Welcome, fellow photographers! Whether you’re a seasoned pro or an aspiring artist, we all know that a picture speaks a thousand words. But, sometimes even the best shots need a little magic to truly shine. Today, we’ll delve into 5 advanced editing techniques that will transform your content and wow your audience. These techniques include Frequency Separation, Dodging and Burning, Color Grading, Layer Masks, and High Dynamic Range (HDR). So, let’s unlock those jaw-dropping results together—starting now!

Frequency Separation

What is Frequency Separation?

Frequency Separation is a powerful technique used to separate the textures and colors within an image. This allows you to retouch skin, smooth out imperfections, and even make subtle changes to colors without affecting the overall structure of the photo.

How to Implement Frequency Separation

To get started with Frequency Separation:

  • Create two duplicate layers of your original image in Photoshop.
  • Apply a Gaussian Blur to the lower layer to remove fine details.
  • Set the upper layer to “Linear Light” and use the High Pass filter to bring back the textures.

This process allows you to edit the smooth areas without disturbing the textures, making it perfect for subtle skin retouching.

Tips for Effective Frequency Separation

Use a soft brush to blend and smooth out skin tones. Be cautious not to overdo it, as this could lead to unnatural results. For more tips, check out our in-depth guide on Frequency Separation.

Dodging and Burning

Understanding Dodging and Burning

Dodging and Burning are classic darkroom techniques adapted for advanced editing to control the light and shadows in your image. By carefully brightening (dodging) or darkening (burning) specific areas, you can add depth and dimension, highlighting or receding features as needed.

Implementing Dodging and Burning for advanced editing techniques

Here’s a simple method to start Dodging and Burning:

  • Create a New Layer and set it to “Overlay” blend mode.
  • Use a soft white brush for dodging and a soft black brush for burning.
  • Adjust the opacity to control the intensity of the effect.

Take your time to build up the effect slowly for natural-looking results.

Pro Tips for Dodging and Burning

Remember to always use a soft brush and work gradually. Focus on areas that naturally catch the light or fall into shadow. For a detailed tutorial, see our comprehensive guide on Dodging and Burning.

Color Grading for Advanced Editing Techniques

The Importance of Color Grading

Color Grading involves adjusting the colors within your photo to create a specific mood or style. It’s a crucial step in post-processing, significantly impacting the emotional response and overall feel of an image.

Steps for Effective Color Grading

While Color Grading can be complex, here’s a straightforward approach:

  • Use Adjustment Layers like Curves, Color Balance, and Hue/Saturation.
  • Experiment with different tones to achieve the desired mood.
  • Use Layer Masks to apply the effects selectively.

This technique can dramatically elevate your photos, providing a consistent and professional look.

Tools for Color Grading

Software like Xora offers advanced Color Grading tools that are user-friendly, making it easier to achieve professional results. For a deep dive into Color Grading techniques, see our detailed guide on Color Grading.

Layer Masks

Why Use Layer Masks in advanced editing techniques?

Layer Masks are essential for non-destructively editing your images. They enable you to control the visibility of different parts of a layer, making it easy to make precise adjustments without permanently altering your image.

How to Use Layer Masks

Here’s how you can utilize Layer Masks effectively:

  • Add a Layer Mask to your adjustment or image layer.
  • Use a black brush to hide areas and a white brush to reveal them.
  • Adjust the opacity of your brush for finer control.

This technique offers flexibility and control, making your editing process more efficient and dynamic.

Layer Mask Tips

Always use a soft brush for smooth transitions. You can also use gradients to create subtle masking effects. For advanced techniques, check out our ultimate guide to Layer Masks.

High Dynamic Range (HDR)

What is HDR?

High Dynamic Range (HDR) photography involves combining multiple exposures of the same scene to capture a broader range of light and detail. This technique can produce stunningly realistic or dramatically stylized images.

Creating HDR Images

To create an HDR image:

  • Take multiple shots at different exposure levels.
  • Use HDR software or tools within Xora to merge these exposures.
  • Fine-tune the combined result to achieve a balanced look.

HDR can bring out details in both shadows and highlights, making it ideal for scenes with a high contrast ratio.

HDR Tips

Avoid over-processing, which can lead to unnatural results. Aim for a balanced exposure that enhances the natural look of your image. For more in-depth HDR techniques, visit our complete guide to HDR photography.

Conclusion

Transforming your content with advanced editing techniques like Frequency Separation, Dodging and Burning, Color Grading, Layer Masks, and HDR can truly unlock jaw-dropping results. By mastering these methods, you’ll elevate your photography to new heights. Xora let’s you focus on these core functions of your skills and manages the business aspect for you. Ready to give it a spin? Try Xora with a free trial today and take advantage of our money-back guarantee! Happy editing!

For more photography tips and tutorials, explore our blog and don’t forget to view our other tutorials for more ways to enhance your skills and creativity.

5 Stunning Sunset Photography Tips: Transform Your Photos with These Expert Secrets

Sunset photography
5 Stunning Sunset Photography Tips: Transform Your Photos with These Expert Secrets 10

Introduction to Sunset Photography


Capturing the beauty of sunset photography is a pursuit that excites photographers of all levels. Sunsets offer a unique palette of colors, lighting conditions, and dramatic scenes that can make for breathtaking photographs. However, achieving that perfect sunset photography shot often requires more than just being in the right place at the right time. In this comprehensive guide, we will explore five expert tips to help you capture stunning sunset photos. These methods will cover everything from leveraging the golden hour to mastering exposure techniques, ensuring your photos stand out. Whether you’re a seasoned photographer or just starting, these tips will elevate your sunset photography game.

The Magic of the Golden Hour

Why is the Golden Hour Ideal?

The golden hour, which occurs shortly after sunrise and before sunset, is pivotal for capturing stunning sunset photography. During this time, the sunlight is softer and warmer, casting a magical glow that can enhance the overall beauty of your photos. The reduced intensity of the sunlight during the golden hour minimizes harsh shadows and highlights, providing a balanced and ethereal lighting setup.

How to Maximize the Golden Hour

To make the most of the golden hour sunset photography, arrive at your shooting location at least 30 minutes before sunset. This will give you ample time to set up your equipment, evaluate the lighting conditions, and find the best composition for your shot. Use a reliable weather app to check the sunset time and weather conditions. Cloud formations can add drama to your sunset photos, so keep an eye out for partially cloudy skies.

You can find out golden hour calendar and calculator that let’s you figure out the best time depending on your location here.

Why You Should Use a Tripod

Stability is Key

Sharpness is crucial when capturing the intricate details of sunset photography. Even the slightest hand movement can lead to blurry images, especially in low-light conditions. Using a tripod ensures that your camera remains stable, allowing you to capture crystal-clear shots.

Extra Control with Long Exposures

A tripod not only helps in maintaining stability but also allows you to experiment with long exposure shots. By using a slower shutter speed, you can capture the movement of clouds or water, adding a dreamy effect to your sunset photography. Ensure you have a sturdy tripod that can withstand different terrains and weather conditions.

Adjust White Balance for Authentic Colors

Understanding White Balance

White balance (WB) controls the color temperature of your photos. Set incorrectly, it can make your sunset photography shots look too blue (cool) or too orange (warm). Adjusting the white balance allows you to capture the true colors of the sunset as you see them.

Manual vs Auto White Balance

While most cameras have an auto white balance setting, it sometimes fails to capture the warm tones of a sunset accurately. Switch to manual white balance and experiment with different settings until you achieve the desired effect. For golden hour, try starting with a WB setting between 5000K to 6500K for natural-looking warm tones.

Include Foreground Elements for Depth

The Importance of Foreground

Adding foreground elements to your sunset shots can create a sense of depth and scale, making your images more engaging. Elements like trees, rocks, water, or even silhouettes of people can add a layer of complexity to your composition.

Balancing Foreground and Background

Ensure that the foreground elements complement the overall composition and don’t overpower the sunset itself. Use the rule of thirds to place your subjects in a way that guides the viewer’s eye through the photograph. Experiment with different angles and perspectives to find the perfect balance.

Mastering Exposure with Bracket Exposures

What is Bracketing?

Bracketing involves taking multiple shots of the same scene at different exposure levels. This technique is particularly useful for sunset photography, where the lighting conditions can be highly dynamic, causing a wide range of exposure levels.

How to Use Bracketing for Sunsets

Set your camera to bracketing mode and take a series of shots—one correctly exposed, one underexposed, and one overexposed. You can later merge these shots using photo editing software to create an HDR (High Dynamic Range) image. This ensures that both the highlights and shadows in your sunset photos are well-exposed, capturing the full range of colors and details.

Additional Tips for Capturing Stunning Sunsets

Use Composition Techniques

In addition to the rule of thirds, consider using leading lines, symmetry, and framing to enhance your sunset compositions. Leading lines such as roads or rivers can guide the viewer’s eye towards the sunset, creating a more compelling image.

Experiment with Filters

Filters like graduated neutral-density (GND) filters can help balance the exposure between the bright sky and the darker foreground. Polarizing filters can reduce glare and enhance the colors of the sunset.

Post-Processing Tips

Post-processing can enhance the final look of your sunset photos. Use software like Adobe Lightroom or Xora to adjust exposure, contrast, and saturation. Be careful not to over-process, as this can lead to unnatural-looking images. Xora, with its advanced editing features, can help you achieve professional results quickly.

More Photography Tips

To learn more about how to compose the best shots, read our other article.

Conclusion


Capturing stunning sunsets requires a combination of timing, technique, and tools. By leveraging the golden hour, using a tripod, adjusting white balance, including foreground elements, and mastering exposure through bracketing, you can significantly improve your sunset photography. Remember to experiment with composition and utilize filters to add depth and drama to your shots. Most importantly, practice and patience are key. The more you experiment, the better you will get at capturing that perfect sunset shot.

For those looking to enhance their photo editing skills, try a free trial of Xora. With a money-back guarantee, there’s no risk in exploring this powerful tool to take your sunset photos to the next level.

External links:
– [Golden Hour Calculator](https://www.golden-hour.com)
– [Adobe Lightroom](https://www.adobe.com/products/photoshop-lightroom.html)

Suggested Visual Content

– High-quality images of different sunset scenes captured using the tips mentioned.
– Infographics showing the difference between auto and manual white balance settings.
– A video tutorial on setting up your camera for bracketing exposures.


“`

Mastering Interior Design Payments and Pay Rates: 10 Powerful Tips for Financial Management for Interior Designers

Interior designer payment
Mastering Interior Design Payments and Pay Rates: 10 Powerful Tips for Financial Management for Interior Designers 11

Introduction

Financial management is a critical aspect of running a successful interior design business. From setting competitive pay rates to managing client payments effectively, mastering your finances can help you maintain profitability and ensure smooth operations. This comprehensive guide explores essential strategies for handling interior design payments and pay rates, offering actionable tips to help you streamline your financial processes.

1. Understanding the Basics of Interior Design Payments

Payment Structures

Interior designers can choose from various payment structures depending on their business model and client preferences. Common payment structures include:

  • Hourly Rates: Charging clients based on the number of hours worked.
  • Flat Fees: Charging a fixed fee for the entire project.
  • Cost Plus: Charging a markup on the cost of materials and services.
  • Percentage of Project Cost: Charging a percentage of the total project cost.

Xora Feature Highlight: Xora allows you to set up and manage various payment structures seamlessly. You can track hourly rates, flat fees, cost-plus arrangements, and percentage-based payments all within the platform.

2. Importance of Clear Payment Terms

Interior designer contracts
Mastering Interior Design Payments and Pay Rates: 10 Powerful Tips for Financial Management for Interior Designers 12

Establishing clear payment terms is crucial for avoiding misunderstandings and ensuring timely payments for interior design projects. Your payment terms should outline:

  • Accepted payment methods
  • Payment schedule
  • Late payment penalties
  • Terms for additional work or changes

Xora Feature Highlight: Xora enables you to create and customize detailed payment terms and schedules, helping you ensure clarity and compliance from your clients.

3. Setting Competitive Interior Design Pay Rates

Researching Market Rates

To set competitive pay rates, research the market rates for interior designers in your area. Consider factors such as:

  • Experience level
  • Specializations
  • Local demand
  • Cost of living

4. Calculating Your Pay Rate

To calculate your pay rate, consider the following:

  • Overhead Costs: Include expenses such as rent, utilities, software, and supplies.
  • Desired Profit Margin: Determine how much profit you want to make after covering your expenses.
  • Billable Hours: Estimate the number of hours you can bill clients each month.

Example Calculation

If your monthly overhead costs are ₹60,000, you want a profit margin of ₹40,000, and you can bill 80 hours per month:

Pay Rate = (Overhead Costs + Desired Profit) / Billable Hours

Pay Rate = (60000 + 40000) / 80 = 1250

Therefore, your pay rate should be ₹1,250 per hour.

5. Creating Detailed Contracts

interior designer contract 1
Mastering Interior Design Payments and Pay Rates: 10 Powerful Tips for Financial Management for Interior Designers 13

Importance of Detailed Contracts

Contracts are essential for setting clear expectations and protecting both parties. A detailed contract should include:

  • Scope of work
  • Project timeline
  • Payment terms
  • Deliverables
  • Cancellation policy

Xora Feature Highlight: Xora provides templates for creating detailed contracts that can be customized to fit your specific project needs, ensuring all critical elements are covered.

6. Setting Up Payment Schedules

Interior Designer Payment Schedule
Mastering Interior Design Payments and Pay Rates: 10 Powerful Tips for Financial Management for Interior Designers 14

An interior design payment schedule helps manage cash flow and ensures you receive timely payments. Common payment schedules include:

  • Upfront Payment: Collecting a percentage of the total fee before starting the project.
  • Milestone Payments: Breaking down the total fee into payments tied to project milestones.
  • Monthly Payments: Billing clients on a monthly basis for ongoing projects.

Example Payment Schedule

For a ₹1,00,000 project, you could set up the following payment schedule:

  • 25% upfront: ₹25,000
  • 25% after design approval: ₹25,000
  • 25% after material selection: ₹25,000
  • 25% upon project completion: ₹25,000

Xora Feature Highlight: Xora allows you to set up and manage payment schedules directly within the platform, sending automatic reminders to clients when payments are due.

7. Invoicing Best Practices

Creating Professional Invoices for Interior Design Payments

Professional invoices not only help you get paid on time but also reinforce your brand. Ensure your invoices include:

  • Your business name and contact information
  • Client’s name and contact information
  • Invoice number and date
  • Description of services provided
  • Payment terms
  • Interior design pay rate
  • Due date
  • Total amount due

Xora Feature Highlight: Xora’s invoicing module allows you to create, send, and track professional invoices effortlessly, ensuring you get paid on time.

Sending Timely Invoices

Send invoices promptly after completing a milestone or providing services. Prompt invoicing increases the likelihood of timely payments.

8. Managing Expenses and Budgeting

Tracking Expenses

Keep track of all business expenses to manage your budget effectively. Use expense tracking software to categorize and monitor expenses, such as:

  • Materials and supplies
  • Travel expenses
  • Marketing costs
  • Office rent and utilities

Xora Feature Highlight: Xora’s expense tracking feature allows you to categorize and monitor all your business expenses in one place, helping you maintain a clear overview of your financial health.

Creating a Budget

Create a budget to plan for future expenses and ensure financial stability. Include the following in your budget:

  • Fixed costs: Rent, salaries, software subscriptions
  • Variable costs: Materials, utilities, marketing
  • Savings: Set aside funds for taxes, emergencies, and business growth

9. Comparing Financial Management Tools

Xora: All-in-One Business Management Software

Black Logo with
Mastering Interior Design Payments and Pay Rates: 10 Powerful Tips for Financial Management for Interior Designers 15

Xora is a comprehensive business management software that integrates key financial management tools tailored for managing interior design payments and pay rates. With Xora, you can manage invoices, track expenses, create budgets, and handle project management all in one platform. Its user-friendly interface and customizable features make it an ideal choice for interior designers looking to streamline their financial processes.

Pros:

  • Integrated invoicing, expense tracking, and budgeting tools
  • Customizable project management features
  • Seamless integration with popular accounting software
  • User-friendly interface tailored for interior designers

Cons:

  • Learning curve for new users

Comparison with Other Tools:

  • QuickBooks: Known for its robust accounting features but lacks integrated project management tools. Xora offers a more holistic solution. Learn more about QuickBooks.
  • Xero: Excellent for small businesses with intuitive accounting features, but limited project management capabilities. Xora combines accounting, project management, and expense tracking. Learn more about Xero.
  • Trello: Great for task management but lacks financial management tools. Xora integrates task management with invoicing and expense tracking. Learn more about Trello.

Xora Feature Highlight: With Xora, you get the best of both worlds: robust financial management tools combined with comprehensive project management capabilities, all tailored for the unique needs of interior designers.

10. Handling Late Payments and Payment Disputes

Interior designer late payment terms
Mastering Interior Design Payments and Pay Rates: 10 Powerful Tips for Financial Management for Interior Designers 16

Setting Up Late Payment Policies

Establish clear policies for late interior design payments, including penalties and interest charges. Communicate these policies to clients upfront to avoid misunderstandings.

Xora Feature Highlight: Xora allows you to set up and enforce late payment policies, including automatic calculation of late fees and sending reminder notifications to clients.

Communicating with Clients

If a payment is late, follow these steps to resolve the issue:

  1. Send a Reminder: Send a polite reminder email with the invoice attached.
  2. Follow Up: If the payment is still outstanding, follow up with a phone call.
  3. Offer a Payment Plan: For clients facing financial difficulties, offer a payment plan to make it easier for them to pay.

If all else fails, consider legal options such as hiring a collection agency or taking the client to small claims court. Always consult with a legal professional before pursuing legal action.

Bonus: Tips for Improving Cash Flow

Diversify Income Streams

Diversify your income streams by offering additional services such as consulting, workshops, or online courses. This can help stabilize cash flow and reduce reliance on a single source of income.

Maintain a Cash Reserve

Maintain a cash reserve to cover unexpected expenses or slow periods. Aim to save at least three to six months’ worth of operating expenses.

Negotiate Payment Terms with Vendors

Negotiate favorable payment terms with your vendors to align with your cash flow. For example, request longer payment terms or discounts for early payments.

Case Study: Financial Success in Interior Design

Background: Sophie, an interior designer in New York, struggled with inconsistent cash flow and late payments from clients. She decided to implement new financial management strategies to improve her business’s financial health.

Strategies Implemented:

  1. Set Clear Payment Terms: Sophie created detailed contracts with clear payment schedules and late payment penalties.
  2. Use Invoicing Software: She started using Xora for invoicing and expense tracking.
  3. Diversify Income Streams: Sophie began offering online design consultations and workshops.
  4. Maintain a Cash Reserve: She built a cash reserve to cover three months of operating expenses.

Results: Within six months, Sophie saw significant improvements:

  • Timely payments increased by 40%.
  • Cash flow stabilized, allowing her to take on more projects.
  • Her business revenue grew by 25%.

Conclusion

Effective financial management is essential for the success of any interior design business. By mastering interior design payments and pay rates, you can ensure steady cash flow, maintain profitability, and focus on delivering exceptional design services to your clients. Implement the strategies outlined in this guide to take control of your finances and achieve financial success in your interior design business.

With the right tools, clear payment terms, and a proactive approach to managing expenses and cash flow, you’ll be well on your way to building a financially stable and thriving interior design business.

Powered by WordPress & Theme by Anders Norén